Accident Investigation
Worker Injury Reporting
Accident investigation is a process for reporting, tracking, and investigating injuries that includes a formal process for investigation, including staffing, performing, documenting, and tracking investigations of process safety incidents and the trending of injury data to identify recurring incidents. This process also manages the resolution and documentation of recommendations generated by the investigations. The goal is to determine the root cause of the injury and provide recommendation on how to prevent similar injuries. Safety and Assurances does provide training on how to conduct injury investigations.
- Injury Investigation Checklist Form (PDF)
- Workers Compensation Electronic Form Process Flow
- Employee Injury and Illness Report (use link or scan QR Code)


Aerial Lifts
Background:
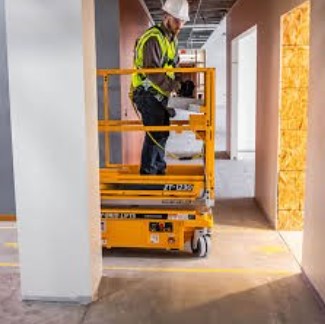
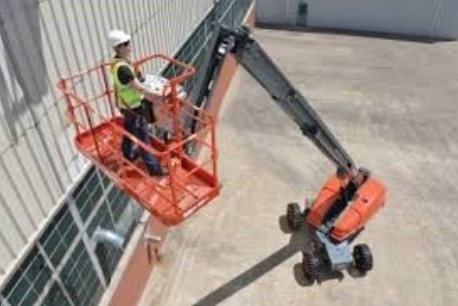
Use of mechanical lifts and powered platforms is routine at UWM. Staff and students using mechanical lifts or powered platforms must receive basic operational and safety training prior to use. Personal protective equipment (PPE) may also be required.
Each operator shall be instructed in the safe and proper operation of the specific aerial device according to the manufacturer’s operator’s manual, UWM work instructions, and any other appropriate standards and safe work practices.
Please contact University Safety & Assurances (safety-office@uwm.edu) for additional information.
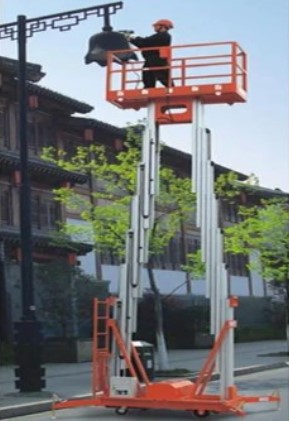
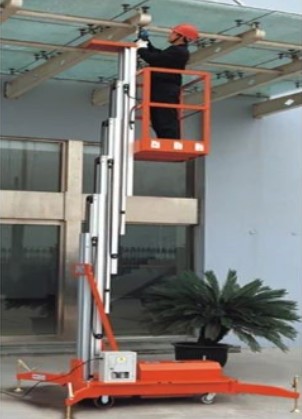
Some Safety Rules for Operating an Aerial Lift:
- Ensure that workers who operate aerial lifts are properly trained in the safe use of the equipment.
- Maintain and operate elevating work platforms in accordance with the manufacturer’s instructions.
- Know the capacity of the lift you will be using and do not overload. Allow for the combined weight of the worker, tools and materials.
- Inspect the lift before each use.
- Check the area of travel for trip hazards and hazards from above and below.
- Maintain a safe distance from power lines (minimum clearance of at least 10 feet).
- Always treat power-lines, wires and other conductors as energized, even if they are down or appear to be insulated.
- Ensure that others are at a safe distance from the lift.
- Never modify the equipment without the manufacturer’s approval.
- If the lift is unattended, lower the platform, shut off the engine, engage the parking brake and remove the key.
- Never override hydraulic, mechanical, or electrical safety devices.
- Never move the equipment with workers in an elevated platform unless this is permitted by the manufacturer.
- Do not allow workers to position themselves between overhead hazards, such as joists and beams, and the rails of the basket. Movement of the lift could crush the worker(s).
- Use a body harness or restraining belt with a lanyard attached to the boom or basket to prevent the worker(s) from being ejected or pulled from the basket.
- Set the brakes and use wheel chocks when on an incline.
- Use outriggers, if provided.
Confined Spaces
Confined Space / Hazardous Space Entry Program
NOTE: For a listing of confined and hazardous spaces, please refer to the inventories listed below. These inventories contains information on any special hazards of each confined space and list precautions necessary to enter these areas. Questions on procedures for confined spaces in academic areas of the campus should be referred to University Safety and Assurances at safety-office@uwm.edu.
Background Information on UWM Confined Space / Hazardous Space Entry Program:
Information and Forms:
- UWM Confined Space Program (PDF)
- Confined Spaces Entry Form (PDF)
- Confined Space Equipment Inventory (PDF)
Campus Inventory:
- Confined Space/Hazardous Space Inventory (PDF), (revised inventory of certified spaces)
- Confined Space Inventory of Non-certified Spaces (PDF)
Other Resources:
- OSHA Safety and Health Topics: Confined Spaces
- NIOSH Criteria Documents: Criteria for a Recommended Standard: Working in Confined Spaces
- Confined Spaces: Hazards and Possible Solutions, U.S. Department of Labor
Confined Spaces: Air Monitoring and Ventilation
Multi-Gas Meters
Multi-gas meters measure “real-time” oxygen content, flammability/explosion potential, carbon monoxide (CO) and hydrogen sulfide (H2S) concentrations. Many deaths occur in the United States every year because of failure to conduct environmental monitoring when performing confined space entry work.
Air Quality Requirements
Interpretation from Wisconsin DILHR 32.64 Air Quality Requirements for Confined Spaces:
ILHR 32.64 Air quality. (1) ATMOSPHERE LIMITS. Except as provided in sub. (3), a confined space may not be entered, unless the atmosphere of the confined space has:
(a) An oxygen content of at least 19.5% or more but not more than 23.5%;
(b) A hydrogen sulfide content of less than 10 parts per million or a carbon monoxide content of less than 35 parts per million;
(c) A combustible gas content less than 10% of the lower explosive limit; and
(d) An exposure level, for any hazardous substance determined to be present, which is at or below the threshold limit value – short term exposure limit for any substance specified by the American Conference of Governmental Industrial Hygienists (ACGIH) in the publication adopted under s. ILHR 32.50 (4), or the short term exposure limits found in 29 CFR 1910.1000.
Ventilation
- Our axial ventilation blowers (Model 1385D Air-Pac) are rated at 714 cfm for one 90 degree bend in hose, or 627 cfm if hose has two 90 degree bends.
- Calculate purge times to achieve at least 7 air changes in the space prior to entry. Use the chart attached to the blower, or use the following equation: Minimum time required to ventilate space = ((7)*(volume confined space in cf))/(blower cfm).
- As a general rule, always push clean air in.
- If using a portable generator to power blower, make sure exhaust from blower is positioned downwind from the space.
- Use GFCI protection if electrical devices must be used, including the blower.
- Do not use blowers for enclosed spaces where damaged asbestos may exist (i.e., use blowers only in asbestos-free areas).
Confined Space Emergency Response Guidelines
All workers who must enter any confined space on the UWM campus must be familiar with these procedures before entry:
- Checklist:
- Review and complete the Confined Space Entry Checklist prior to entry. The response to each question must be either “Yes” or “Not Applicable” in order to proceed with the entry.
- Prevention:
- The best way to survive an emergency involving a confined space is to avoid having the emergency. These procedures assume that workers entering a confined space will follow procedures established for routine entry into confined spaces. While some of the requirements may seem unusual or cumbersome, the procedures are necessary to prevent emergencies or to help workers survive a confined space emergency. Workers must complete the “Confined Space Entry Checklist,” follow the precautions listed on the Campus Confined Space Inventory (PDF) and any other specific procedures established by your unit.
- Preparation:
- Prior to any confined space entry, contact the University Police to provide information regarding the entry: location of the confined space, personnel involved, duration of entry, and any other relevant information. If the police have been notified of your confined space entry, they will have fewer questions and there will be less confusion during the emergency. The University Police are trained “first responders” and can respond to an emergency at any location on campus within two minutes. In the event of a confined space emergency, the University Police will notify the City of Milwaukee Confined Space Rescue Team of the Milwaukee Fire Department’s HazMat Team. Another key to confined space emergency response is having adequate communication available to quickly summon trained assistance. Most confined space assessments require that two-way communication be established between the entrant and the safety attendant, or safety watch. Some pre-planning is needed to establish who will contact emergency responders in the event of an emergency. The following hierarchy is offered as a possible plan.
- First, the two way communications between the entrant and the safety watch may also link to others who can notify the University Police. The two-way radios have a direct link to the University Police. You can request that the police monitor this channel when you call to alert them of your confined space entry.
- If the two way communication does not reach other assistance, enlist the help of any passers-by. Direct them to contact the University Police from the nearest Emergency Call Box (the yellow boxes with the purple beacons). Stay at the confined entry location until emergency responders arrive and do NOT attempt a rescue entry.
- If no one is in the vicinity who can call the University Police for you, inform your co-worker that you are going for help and call from the nearest campus phone or Emergency Call Box. Return to the confined space location until trained assistance arrives, but do NOT attempt a confined space rescue.
- If the emergency involves a person hurt or unconscious within a confined space and if the victim is connected to an emergency retrieval system and if you have been trained in the proper procedures for the retrieval system, first try to call for help, if feasible. Then, try to retrieve your co-worker if you are trained to operate the retrieval system.
- Do NOT move the victim if a back or neck injury is suspected. The proper use of the fall protection system (an integral part of our emergency retrieval system) should prevent these types of injuries in most cases. Be aware of incidents which could still happen involving damage to the spine or neck.
- Prior to any confined space entry, contact the University Police to provide information regarding the entry: location of the confined space, personnel involved, duration of entry, and any other relevant information. If the police have been notified of your confined space entry, they will have fewer questions and there will be less confusion during the emergency. The University Police are trained “first responders” and can respond to an emergency at any location on campus within two minutes. In the event of a confined space emergency, the University Police will notify the City of Milwaukee Confined Space Rescue Team of the Milwaukee Fire Department’s HazMat Team. Another key to confined space emergency response is having adequate communication available to quickly summon trained assistance. Most confined space assessments require that two-way communication be established between the entrant and the safety attendant, or safety watch. Some pre-planning is needed to establish who will contact emergency responders in the event of an emergency. The following hierarchy is offered as a possible plan.
Contacting The University Police:
- From any Emergency Call Box: Push the red button and hold until the dispatcher answers. Once the call is answered, release the button.
- From a cell phone: Dial 414-229-9911. You will be connected with the UWM Police Department Dispatcher. UWM University Police will arrive in addition to other emergency responders.
- State that you have a confined space emergency
- Describe the nature of the emergency (injury, entrapment, fire)
- State the location of the incident
- Give your name
- Stay on the line until the police have finished asking you for any further information. Let the police hang up, not you.
If you are able to contact the police directly, less confusion will occur than if some untrained intermediary is involved. However, in an emergency, just about anyone should be able to coherently contact the police from one of the Emergency Call Boxes. The police can at least identify which box is being used to make the call. Clearly stating that the incident involves a confined space is crucial to prompt mobilization of trained rescue personnel.
Again, remember to use the established precautions listed on the Confined and Hazardous Space Inventory (PDF). Copies of the inventory are available from Physical Plant Services or the Department of University Safety and Assurances.
If you notice any hazards not addressed by the precautions on the Confined and Hazardous Space Inventory, bring those concerns to the attention of your supervisor, the PPS Safety Committee and/or the Department of University Safety & Assurances.
Confined Spaces: Hierarchy of Permit-Spaces
What is a “Permit Required Confined Space”?
A permit-required confined space means a confined space that has one or more of the following characteristics:
- Contains or has a potential to contain a hazardous atmosphere;
- Contains a material that has the potential for engulfing an entrant;
- Has an internal configuration such that an entrant could be trapped or asphyxiated by inwardly converging walls or by a floor which slopes downward and tapers to a smaller cross-section; or
- Contains any other recognized serious safety or health hazard.
At UWM, the best option is no entry into permit-required confined spaces! In other words, perform the work without entering the permit space. When this isn’t possible, then follow the “hierarchy” listed below. All references are to OSHA 29 CFR 1910.146:
Permit Space Entry – Hazards Cannot Be Eliminated nor Controlled (c)(4):
- written program and procedures (d)
- permit specifications (e and f)
- training specifications (g)
- attendant specifications (d)(6)
- entry supervisor specifications (e)(2)
- testing specifications (d)(5), (see CPL 2.100, pgs. 23-24)
- rescue specifications (k)
Alternate Entry – Hazards Controlled (by continuous forced air ventilation)(c)(5):
- Only hazard is actual or potential hazardous atmosphere. Continuous forced air ventilation alone is sufficient to maintain safe entry.
- No formal written program required for this option (i.e., a “mini-program”); requirements in (c)(5)(ii) act as a substitute written program for this option.
- Document determinations and supporting data. The determination and special requirements will be included in the UWM Confined Space Inventory (PDF). ((c)(5)(i)(E), see CPL 2.100, pgs. 19-20).
- No permit system or permits; however, a signed, written certification is required.
- Certification is made available to entrants (c)(5)(ii)(H). Document determinations and supporting data (i.e., write down your air monitoring data and submit to your supervisor for evaluation and documentation).
- Will work operations within the space introduce any new hazards? (e.g., Will welding be conducted or flammable or hazardous cleaners be used?) If yes, the space is ineligible for (C)(5) procedures.
- No attendant or supervisor required (but may be necessary depending on the circumstances).
- No rescue provisions required (but may be necessary depending on the circumstances).
- Training is required.
Reclassification – Hazards Eliminated (c)(7):
- Space poses no actual or potential atmospheric hazards.
- Certify that all hazards within the space have been eliminated. Consider atmospheric hazards, engulfment, configuration, and energy hazards.
- Document the reclassification determination in writing. This information will be included in the UWM Confined Space Inventory (PDF).
- Certification made available to entrants (c)(7)(iii).
- No rescue provisions required (but may be necessary depending on the circumstances).
- Training is required.
Remember: If the conditions change, you must re-evaluate the space!
Source: OSHA Training Institute, Course 226-Permit-Required Confined Space Entry, December 1998, Madison, Wisconsin.
Confined Space Program — Questions & Answers
Background
Why do we have to do this?
State and Federal regulatory agencies have determined that confined spaces have a higher potential for serious harm than other locations in the workplace. Every year several hundred people are killed or injured in confined spaces, most of them, while they were just doing their job. This program is for your safety.
Source: Worker Deaths in Confined Spaces, A Summary of Surveillance Findings and Investigative Case Reports, NIOSH/CDC, January 1994.
The State of Wisconsin has recently adopted the federal regulations, while OSHA has continued to clarify aspects of their confined spaces regulations.
How are we going to train new people?
Supervisors will be responsible for arranging the training of new workers.
What if someone tells me I don’t need to do all of this?
Governor Thompson’s Executive Order #194 mandates that state government should lead by example by complying with all state and federal health and safety requirements, including confined space entry requirements. This program has the support of all levels of management.
What are the different classes of confined spaces?
- Permit Spaces (C4)
- Alternate Entry Spaces (C5)
- Hazards Eliminated Spaces (C7)
Why not treat all confined spaces as Alternate Entry – Continuous Ventilation Required (C5) spaces until they can be proven to be Reclassified as Hazards Eliminated (C7) spaces?
Good strategy.
Why aren’t all the spaces labeled? Or even identified?
This will be an ongoing effort, with continual review and improvement. OSHA does not require labeling of confined spaces. OSHA does require you to be familiar with the confined space policies and procedures. Appropriate signs and labels are part of that familiarity.
You may well recognize additional confined spaces in your workplaces which have not been identified. Please report these to your supervisor or to your safety committee representative. We will try to evaluate the space and add it to the inventory. Your contributions are vital to the success of this program.
The labeling of the confined spaces is an on-going effort by your safety committee. Please report any unlabeled confined space to your supervisor by filling out a trouble report, if you think labeling that space would increase the awareness of the hazard and the required precautions.
What about the inventory?
The inventory catalogs all the documented confined spaces on campus, at Kenilworth and the Great Lakes Freshwater Research (GLFR), and at some of the other remote work places at UWM. We hope the confined space inventory will be used as a training tool and a reference. Additions, omissions and corrections to the inventory should be brought to the attention of your supervisor. You should become familiar with the inventory and know its usefulness and limitations.
What if a space is missing from the inventory?
Report it to your supervisor.
Can we still use the tripod/retrieval system if it isn’t a Permit Required Space (C-4)?
Yes. The requirements listed should be considered the minimum requirements. If you think additional safety systems are needed, inform your supervisor before you enter.
What if we have been in a pit a hundred times; can’t we just reclassify the pit as a Hazards Eliminated Space (C7) based upon no air contamination ever happening there?
OSHA requires that each Reclassified Space – Hazards Eliminated (C7) space undergo a hazard evaluation for the reclassification. This evaluation has to be documented and made part of the written confined space plan. While previous entries can be part of the evaluation, air monitoring records that show no contamination over time is what is expected by OSHA and the Department of Commerce.
How often do people need to be retrained?
Training is necessary whenever a significant change occurs in the work practices or in the regulations.
General Procedures
What type of communication should be on site for all these spaces?
- For Alternate-Entry Continuous Ventilation Required spaces, or Hazards Eliminated Space, notify your supervisor when you intend to enter the space. Provide an estimate of the amount of time you plan to be in the confined space. Estimate the maximum time you’ll work there. Notify your supervisor after you leave the space.
- For Permit Confined Spaces, two-way radios, cellular phones or another reliable 2-way device must be used unless direct line of sight is maintained and noise levels do not hinder voice communications. The method must be specified on the permit.
How many people are allowed in the confined space?
One, if the space is determined to be a permit-required (C4) space. If you want more people to enter, more equipment for potential emergencies must be obtained. If the space is rated as an Alternate Entry – Ventilate (C5) space, or a Reclassified – Hazards Eliminated (C7) space, as many people as can safely work in the space are allowed.
Do I need an attendant every time I go into one of these spaces?
Check the inventory. All permit confined space will require a second person as an attendant. Any other space which requires the Emergency Retrieval System, also requires an attendant.
What other personal protective equipment is required for confined space entry?
Each work space must be evaluated separately. The need for shoes, eye wear, hard hat, protective clothing and gloves should be evaluated separately from the confined space hazards. Respirators should only be worn in conjunction with an approved respiratory protection program, which includes medical surveillance, fit testing, written plans and more.
What about confined spaces that don’t have fixed ladders?
A portable ladder may be used to gain entry into a confined space. The tripod and winch assembly may be used to lower a person into a confined space. However, if a winch is used for lowering someone into a pit greater than six feet deep a second system of fall protection must be added. In other words, the same winch and cable can be used for fall protection and retrieval, but not for all three (lowering, fall protection and emergency retrieval).
How do we protect openings when working in confined spaces?
When the opening is in a public walkway, ADA-compliant barricades must be set up to protect the public. You must set up barricades to protect pedestrian traffic from all possible directions. Barricades must be lit during hours of darkness.
When out of pedestrian traffic lanes and sidewalks, the tripod and attendant should be sufficient to protect the public from the confined space openings. The attendant should not be distracted from their attendant responsibilities by having to direct traffic or otherwise protect the opening at the expense of attending to the entrant.
For an Alternate Entry using continuous ventilation, use the pedestrian barricade to protect the opening.
What are the attendant’s responsibilities?
Other than assisting and protecting the entrant, protecting the public is the most important task for the attendant. The attendant must not be given duties which could interfere with either of these responsibilities. If the attendant cannot accomplish both simultaneously, extra attendants or barricades must be established before the entry can continue.
The attendant must also be able to effectively operate the emergency retrieval system. In an emergency, the attendant must be able to make timely and accurate decisions to ensure emergency procedures are effective.
What about bringing chemicals into confined spaces?
Be sure that this additional potential hazard is controlled. Chemicals can add additional atmospheric hazards in a confined space, which must be monitored. Chemicals may contribute additional hazards (fire risk, contact hazards, etc.) which must be controlled. Supplemental ventilation and other controls may be needed. Be sure that a competent confined space supervisor and safety professional have reviewed the design of the additional precautions. These special requirements will be added to the confined space inventory for future reference.
Air Monitoring
What if gas detector alarm goes off before I go into the space?
Do Not Enter the Space! Notify your supervisor. The source for the abnormal condition(s) must be identified and controlled. Additional precautions will be necessary.
What if the gas detector registers an oxygen deficit, combustible or toxic potential but it doesn’t alarm? Then what?
Do Not Enter the Space! If you’re already in the space, you should leave immediately. Reentry must be postponed pending further investigation. Notify your supervisor. The source for the abnormal condition(s) must be identified and controlled. Additional precautions will be necessary.
What if the gas detectors alarm while I am in the space?
Leave the Confined Space Immediately! Seconds may count. Notify your supervisor. The source for the abnormal condition(s) must be identified and controlled. Additional precautions will be necessary.
Non-Entry Rescue
What do I do in an emergency situation?
Written emergency response guidelines have been adopted. Be sure to be familiar with these guidelines before beginning confined space entry.
What if the person in the space is incapacitated and needs immediate rescue? What should I do first?
Do Not Enter the Space Yourself! Call for help. Use your two-way communication to get assistance. Call the campus police at 414-229-9911. Relay your location, the nature of the incident and emphasize the incident has occurred in a confined space. Once help has been called, you may use the retrieval system to get your partner out of the space, only if the rescue is a simple vertical withdrawal.
Do not attempt a non-entry rescue if your partner might be dragged around a corner or between obstacles which could entangle or injure him/her. Do not move your partner if you suspect a head or neck injury may have occurred.
Special Cases
What if I can’t fit in the space?
Engineering or administrative controls will be needed. A smaller person might need to be assigned to a task requiring entry into a small space.
What if the space doesn’t have a standard opening?
Most spaces which require an Emergency Retrieval System allow for the use of the tripod and the standard issue retrieval equipment. Those spaces where the tripod cannot be used, such as vertical access openings, will require alternate methods of retrieval. Some of these spaces will have engineered solutions specific to that one space. Anchor points may need to be mounted across from vertical openings or other engineered solutions may be required. These exceptions will be noted on the inventory.
What if space doesn’t allow putting up the tripod?
An engineered solution may be needed. Notify your supervisor or safety committee representative.
Fall Protection
What’s the rule-of-thumb on fall protection for confined spaces?
Any potential fall over 6 feet requires fall protection, excepting ladder or elevated lifts (cherry picker, scissors lift). So if fall potential exceeds 6 feet and you are not on a ladder or lift, then you need fall protection equipment.
Welding
What if I have to weld in confined spaces?
As with other welding operations, sufficient precautions must be taken. In a confined space the atmospheric conditions become vitally important and must be monitored. Welding can both introduce new contaminants and use up limited oxygen. The multi-gas detector is vital in these situations.
Supplemental ventilation and special Personal Protective Equipment (PPE) may be necessary. In most circumstances, reclassification to a Permit Required Space (C4) will be necessary.
Respirators
What if a space requires respiratory protection?
Requirements of both respiratory protection and confined space entry will need to be followed. Respirator programs require medical monitoring, training, fit testing, respirator selection and more. If a confined space entry requires a respirator, question whether you should be involved in the entry. Respirator use CANNOT override the multi-gas detector alarm.
Summary
After all this has been said, what basic equipment is always required?
It really depends on the circumstances. Generally all spaces will require air monitoring. Also, two-way communication or a pre- and post- supervisor notification is usually required. Look on the inventory for additional requirements.
What if something appears unsafe despite the precautions mandated?
Contact your supervisor. Your training and experience should give you a good basis for using sound judgment when working in confined spaces. Do Not Take Shortcuts!
Ergonomics
UWM Campus and State of Wisconsin Resources:
- Campus Ergonomic Services, College of Health Sciences
- Ergonomics for Telecommuters (PDF)
- Applying Ergonomics While Working From Home (PDF)
- State of Wisconsin DOA Web-based Ergonomic Training Program for State Employees
- Ergonomic Risk Factors
- Working Safety with Video Displays
Other Resources:
NIOSH Resources:
- Ergonomic Guidelines for Manual Material Handling, April 2007
- Easy Ergonomics: A Guide to Selecting Non-Powered Hand Tools (PDF), Centers for Disease Control
- Ergonomics and Musculoskeletal Disorders, CDC/NIOSH
- NIOSH Elements of Ergonomics Programs–A Primer Based on Workplace Evaluations of Musculoskeletal Disorders
OSHA Resources:
- OSHA eTool for Computer Workstations
- OSHA’s Computer Workstation Checklist
- OSHA’s “Purchasing Guide Checklist
Telecommuting Safety
- Ergonomics for Telecommuters (PDF)
- Applying Ergonomics While Working From Home (PDF)
- Telecommuting Safety Checklist (PDF)
Fall Protection
Background
Falls remain the number one killer of workers in the construction industry and the number two killer of workers in private industry, according to the Bureau of Labor Statistics. In 2006, the Bureau of Labor Statistics (BLS) reported that fatal work injuries involving falls increased 5 percent in 2006 after a sharp decrease in 2005. The 809 fatal falls in 2006 was the third highest total since 1992, when the fatality census began.
Falls from ladders and roofs still account for the majority of falls. Identifying fall hazards and deciding how best to protect workers is the first step in reducing or eliminating fall hazards.
Studies have shown that the use of guardrails, fall arrest systems, safety nets, covers, and travel restriction systems can prevent many deaths and injuries from falls. (Source: OSHA http://www.osha-slc.gov/SLTC/fallprotection/index.html).
All fall hazards should be identified at work sites with the potential for elevated work. Once an elevated fall hazard has been recognized, an appropriate control measure must be selected. Priority should be given to elimination of the fall hazard over the use of fall protection equipment. The first line of defense in addressing a fall hazard is to identify and eliminate the hazard. If a fall hazard cannot be eliminated, the second consideration would be to assess the workplace and process and implement an effective permanent means of providing fall protection. If a fall hazard cannot be eliminated and changes to the workplace cannot adequately ensure the prevention of falls, the last line of defense should be to control the fall.
Any time a worker is at a height of four feet or more, the worker is at risk and needs to be protected. Fall protection must be provided at four feet in general industry, five feet in maritime and six feet in construction. However, regardless of the fall distance, fall protection must be provided when working over dangerous equipment and machinery. Fall protection must be provided on roofs without 42″ high parapet walls or railings. Workers must use fall protection where required. Supervisors are jointly responsible for ensuring worker’s safety.
Examples of Some Areas Requiring Fall Protection at UWM

- Tours or Inspections of Green Roofs For more info on UWM Green Roofs, visit the UWM Office of Sustainability web page.
- Policy for Sandburg Roof Garden Inspections and Tours (PDF)
- Accessing Lights or Equipment on Theatre Catwalks
Types of Fall Protection Systems
There are two types of fall protection systems: “active” and passive”.
| PASSIVE FALL PROTECTION SYSTEMS INCLUDE: | ACTIVE FALL PROTECTION SYSTEMS INCLUDE: |
|---|---|
| Aerial Lifts and Platforms Guardrails Safety Nets Safety Monitors Barricades | Life lines Work positioning Personal Fall arrest equipment |
Components of a “Personal Fall Arrest System”
A personal fall arrest systems consists of the following:
- Full-body harness
- Body Belt
- Lanyard
- Lifeline
- Snap hooks
A full-body harness consists of nylon and/or polyester straps that encompass the chest, chest and waist or full body. In the event of a fall, a full body harness distributes the fall arrest force over the pelvis, thighs, waist and shoulders. The attachment of the body harness must be located in the center of the wearer’s back, near the shoulder level, or above the head.
* OSHA Standard: 1926.502(d)(17)
Additional Information About Fall Protection at UWM:
Contact University Safety and Assurances to identify and address fall protection issues at UWM. Employees should contact their supervisors for fall protection program information and training.
Fall Protection Resources:
- Fall Protection Program (PDF)
- OSHA Fall Protection Information
- OSHA Construction eTool on Fall Protection
- Suspension Trauma/Orthostatic Intolerance OSHA Safety and Health Information Bulletin
- Guide to Developing a Fall Protection Program (PDF) State of Wisconsin, Department of Administration
Fire Safety
Campus Policy – Fire Safety
UW-System Policy, Chapter 18 Conduct on University Lands – Fire Safety, establishes procedures for faculty, staff and students to protect lives and property.
- “No person may light, build or use, or cause another to light, build or use, any fires, including but not limited to burning candles, burning incense or gas or charcoal cooking appliances, on university lands or in university facilities except in such places as are established for these purposes and designated by the chief administrative officer.”
- UWM departments or UWM-approved groups desiring to engage in one of the above activities (such as grilling or other fire cooking apparatus) must receive approval from the Director of Facility Services via University Safety and Assurances. Complete the Grilling or Other Outdoor Fires Approval form.
- “No person may handle burning material in a highly negligent manner. In this subsection, burning material is handled in a highly negligent manner if it is handled under circumstances in which the person should realize that a substantial and unreasonable risk of serious damage to another’s property is created.”
- University Safety and Assurances can perform a fire risk assessment of your activity prior to conducting the activity.
- “No person may throw away any cigarette, cigar, pipe ash or other burning material without first extinguishing it.”
- Use the receptacles provided for safety and campus cleanliness. Be a responsible smoker.
Elements of a Fire
For many years the concept of fire was symbolized by the Triangle of Combustion and represented, fuel, heat, and oxygen:
- Fuel — For a fire to start there must be something to burn. The physical state of the fuel may be gases (natural gas, propane, butane, hydrogen, etc.); liquids (gasoline, kerosene, turpentine, alcohol, paint, varnish, lacquer, etc.) or solid (coal, wood, paper, cloth, grease, etc.)
- Heat — For a fire to start there must be a source of ignition, usually heat or a spark. Heat sources include: open flame, hot surfaces, sparks and arcs, friction-chemical action, electrical energy and compression of gases
- Oxygen — A source of oxygen is needed. Approximately 16% is required. Normal air contains 21% oxygen. Some fuels contain enough oxygen within their make-up to support burning.
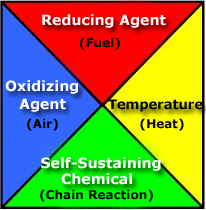
Further fire research determined that a fourth element, a chemical chain reaction, was a necessary component of fire. The fire triangle was changed to a “Fire Tetrahedron” to reflect this fourth element.
The four elements are:
- Oxygen to sustain combustion
- Sufficient heat to raise the material to its ignition temperature
- Fuel or combustible material, and subsequently
- An Exothermic Chemical Chain Reaction in the material.
Help Eliminate Fire Hazards
Electrical Abuse:
- Electrical hazards represent a serious, widespread occupational danger; practically all members of the workforce are exposed to electrical energy during the performance of their daily duties. It is important that you be aware of the potential for fire resulting from electrical hazards.
- Use of electrical “octopuses” to obtain more outlets can result in overloaded circuits and fire. Use only 15 amp fused power strips. Replace damaged wires and be sure to match your appliance power requirements to the circuit power.
- Never remove the grounding post from a three-prong plug.
- Hotplates, coffee makers, irons, space heaters, etc. should never be left unattended. They should be unplugged after use and not stored until they are cool enough to touch. Keep heaters away from curtains and furniture.
- Match the size of an extension cord to the appliance power cord to prevent cord overheating. Extension cords are not intended for “permanent” installations. Wherever possible, appliances shall be connected to permanently wired receptacles.
- Examine outlets for signs of damage. DO NOT USE DEFECTIVE EQUIPMENT, CORDS OR OUTLETS UNTIL REPAIRS HAVE BEEN MADE.
- A three-foot clearance is required in front of all circuit breaker panels. Storage of combustibles in mechanical/electrical service closets is prohibited.
See also Electrical Safety in the Office (PDF) for information relating to eliminating electrical hazards in the office environment.
Obstacles:
Storage of bicycles, chairs, desks, file cabinets, boxes and other items is prohibited in all exit ways. Storage is prohibited in all exits and aisles leading to exits. This includes primary hallways and all stairwells.
Exits must remain unobstructed and accessible at all times. Blocked exits have caused “chain reaction” pile-ups of fallen people during emergencies. Obstructed stairwells or exits can seriously hinder your escape effort during an emergency.
Historically, blocked exits are the cause of most fire-related deaths in commercial buildings.
Open Flames:
Open flames such as Bunsen burners, barbecue grills, torches, etc. shall never be left unattended. Extinguish all open flames, even if left for a very short time.
Never:
Never prop open fire doors with wedges or other objects. The very purpose of these doors is to prevent smoke and heat from traveling up stairwells and along corridors.
Flammable Liquids and Gases:
- Storage of flammable liquids in laboratories, shops, and classrooms is limited to specific quantities and approved containers, cabinets or vaults.
- Know what the maximum permissible quantity of flammable liquids is for your laboratory area and never exceed this amount. Reference your department’s Laboratory Safety Plan for additional information.
Other Resources
- Types of Fire Extinguishers (PDF)
- Holiday Decoration Policy at UWM (PDF)
- The College Student’s Guide to Fire Safety and Education”
Fire Inspection Checklist
The following items are included on the checklist used by the Milwaukee Fire Department when inspecting UWM buildings: Here is a Fire and Life Safety Inspection Building Checklist for your use.
Exits
- Obstructed exit: Remove any obstruction to exit immediately.
- Fire escape route blocked or restricted: Remove any obstruction to fire escape route immediately. Storage resulting in restricted access is prohibited.
Fire Doors
- General: Exit doors must be identified and operable.
- Exit door blocked or restricted: Remove any obstruction to exit doors immediately.
- Inoperative fire door: Fire doors must be operative, self-closing or attached to a fused device.
- Closing door device: Check self-closing device to assure it is functional.
- Door wedged open: Immediately remove wedge or item holding fire-rated door in an open position.
- Latches: Self-closing doors should close fully and latch.
- Panic Bar: Assure that panic bar is in operable condition.
Housekeeping – Miscellaneous
- Aisles/Stairs/Hallways: Immediately remove any obstruction, material, trash that could hamper easy exits from aisles, hallways and stairwells.
- Storage in basements and attics: Must be neat and reasonable.
- Storage in stairwells and stairwell landings is prohibited.
- Wall decorations: Combustible decorations on walls not to exceed 10% of overall wall space.
- Gas cylinders: Pressurized cylinders must be labeled and secured.
- Storage areas: Storage rooms or areas must be neat and reasonable.
Extinguishers
- Charge: Examine pressure gauge to determine if fully charged.
- Service: Examine extinguisher pin for any apparent damage and check for broken seal.
- Tagged/Marked: Tag should indicate inspection within past month.
- Blocked: Assure that extinguisher is accessible for use and unblocked by furniture or debris (3 foot minimum clearance).
- Mounted: The top of the fire extinguisher should be no more than five feet from the floor.
Flammable And Combustible Liquids
- Storage: Flammable liquids must be stored in a flammable liquids safety container.
Combustibles
- Excessive/Improper Storage: Remove flammable decorations from areas of assembly to alleviate hazard. Remove combustible material from mechanical or equipment rooms.
Electricity
- Defective Fixtures: Assure immediate repair of any damaged electrical fixtures.
- Missing Cover Plate: Immediately replace any missing or damaged outlet covers.
- Missing Electrical Panel Cover: Report any missing or damaged electrical panel covers.
- Extension Cord: Cords are allowed for temporary use of portable appliances.
- Access Blocked to Electrical Panel: Remove materials blocking access to panel (3 foot minimum clearance).
Sprinklers
- Storage: No items may be stored within 18″ of a sprinkler head in any direction.
Miscellaneous
- Report any damaged or defective fire doors, unlit exit lights, smoke detectors, or sprinklers to Physical Plant Services.
Portable Fire Extinguishers
Employees are not expected to fight fires. Your responsibility in a fire situation is to alert others and to evacuate.
Small fires can often be put out quickly by a well-trained individual with a portable fire extinguisher. However, to do this safely, you must understand the use and limitation of a portable fire extinguisher and the hazards associated with fighting fires. Do not attempt to extinguish any fire without calling for help and pulling the fire alarm. Always leave an exit at your back in order to escape before using an extinguisher. Make sure the fire is limited to the original material ignited andis contained (such as in a waste basket).
To extinguish a fire with a portable extinguisher, a person must have immediate access to the extinguisher, know how to actuate the unit, and know how to apply the agent effectively. Attempting to extinguish even a small fire carries some risk. Fires can increase in size and intensity in seconds, blocking the exit path and creating a hazardous atmosphere. In addition, portable fire extinguishers contain a limited amount of extinguishing agent and can be discharged in a matter of seconds. Therefore, individuals should attempt to fight only very small or incipient stage fires.
Remember (P.A.S.S.): Pull, Aim, Squeeze, Sweep

Pull
Holding extinguisher upright, twist the pin to break the plastic safety seal. Pull the pin completely out.
Aim
Aim low. Point the extinguisher nozzle (or its horn or hose) at the base of the fire not the flames. This is important – in order to put out the fire, you must extinguish the fuel.
Squeeze
Squeeze the handle. This releases the extinguishing agent.
Sweep
Using a sweeping motion, move the fire extinguisher back and forth until the fire is completely out. Watch the fire area. Back away if fire breaks out again repeat the process.
Operate the extinguisher from a safe distance, several feet away, and then move towards the fire once it starts to diminish. Be sure to read the instructions on your fire extinguisher – different fire extinguishers recommend operating them from different distances. Remember: Aim at the base of the fire, not at the flames!
Report missing, discharged, or otherwise tampered with fire extinguishers to Facility Services (414-229-4742)
Fire Extinguisher Training
The UWM Department of University Safety and Assurances offers fire extinguisher training to UWM faculty, staff, and students upon request. This course utilizes live fire scenarios and actual fire extinguishing equipment. Training includes a lecture and then individual “hands-on training.”
Training can be arranged in various locations on campus and will be scheduled for groups of 10 or more. If you are interested in attending the next session of this training, please contact University Safety and Assurances.
Forklifts
Background:
Use of mechanical lifts and powered platforms is routine at UWM. Staff and students using forklifts must receive basic operational and safety training prior to use. Personal protective equipment (PPE) may also be required.
Each operator shall be instructed in the safe and proper operation of the specific aerial device according to the manufacturer’s operator’s manual, UWM work instructions, and any other appropriate standards and safe work practices.
Please contact University Safety & Assurances (414-229-6339) for additional information.
Some Safety Rules for Operating an Aerial Lift:
- Ensure that workers who operate forklifts are properly trained in the safe use of the equipment.
- Maintain and operate forklifts in accordance with the manufacturer’s instructions.
- Know the capacity of the lift you will be using and do not overload. Allow for the combined weight of the worker, tools and materials.
- Inspect the lift before each use.
- Check the area of travel for trip hazards and hazards from above and below.
- Ensure that others are at a safe distance from the lift.
- Never modify the equipment without the manufacturer’s approval.
- If the lift is unattended, lower the platform, shut off the engine, engage the parking brake and remove the key.
- Never override hydraulic, mechanical, or electrical safety devices.
- Never move the equipment with workers in an elevated platform unless this is permitted by the manufacturer.
- Do not allow workers to position themselves between overhead hazards, such as joists and beams, and the rails of the basket. Movement of the lift could crush the worker(s).
- Use a body harness or restraining belt with a lanyard attached to the boom or basket to prevent the worker(s) from being ejected or pulled from the basket.
- Set the brakes and use wheel chocks when on an incline.
- Use common sense.
Powered Industrial Truck Written Program
Hot Work (Welding/Torching/Brazing)
Background:
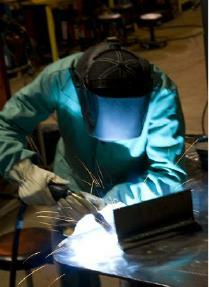
Welding, torching and brazing are a common activity in UWM maintenance activities, shops and instructional areas.
Supervisors and instructors must ensure all equipment is code-compliant, in safe working order and that users are properly trained in the safe use of the equipment.
Please direct any questions regarding safety procedures to your supervisor or instructor or the Department of University Safety and Assurances.
General Rules for Welding at UWM Include:
- There are specific fire safety requirements for welding, torching and other “hot work” at UWM. These requirements are outlined in the HOT WORK written program/Standard Operating Procedure UWM Hot Work Written Program (PDF). The document is a template to be used for adoption by departments that perform hot work operations. For additional information please contact or call University Safety and Assurances (safety-office@uwm.edu)
- Know the hazards of the material(s) you are working with. Contact your supervisor for Safety Data Sheets (SDS). Please contact the Department of University Safety and Assurances (safety-office@uwm.edu) for air monitoring / exposure evaluation to welding fume.
- Precautions such as isolating welding and cutting, removing fire hazards and combustibles and providing a fire watch for fire prevention shall be taken in areas where welding or other “hot work” is performed.
- A “fire watch” shall be provided during the work and maintained for at least 30 minutes after welding, torching or other “hot work” has been completed. The “fire watch” is responsible for monitoring the entire operation to ensure that a fire is not started and to quickly extinguish any small fires that may ignite.
- A fire extinguisher must be located adjacent to the activity and should be immediately available to the fire watch. The individual assigned to fire watch duties should not have other functions to perform and should maintain a constant vigilance over the operation.
- Eye protection shall be worn. Other persons adjacent to the welding area shall be protected by noncombustible or flameproof screens or shields and shall wear appropriate eye protection.
- In shops, studios and laboratories, use the exhaust ventilation such as snorkel hoods and capture hoods to minimize your exposure to welding fume. Contact your supervisor or instructor for instructions on the proper use and limitations of this safety equipment.
Other Resources:
Ladder Safety
Select the Appropriate Ladder:
The most common cause of ladder accidents involves not selecting the right ladder for the job. When working indoors, a step stool or stepladder, platform or multi-purpose ladder is usually recommended. For outdoors, a taller step, multi-purpose or extension ladder is often more appropriate.
Always check the duty rating of the ladder you will be using and verify the maximum load. The “duty rating” is the maximum load capacity of the ladder. Do not assume that a longer ladder has a higher duty rating. There is no relationship between length and duty rating. Be sure to select a ladder designed to hold the necessary load, including the worker and equipment.
Duty Ratings:
- Type IAA: Special-duty rating — 375 lbs
- Type IA: Extra heavy-duty rating — 300 lbs
- Type I: Heavy-duty rating — 250 lbs
- Type II: Medium-Duty rating — 225 lbs (not recommended at UWM)
- Type III: Light-Duty rating — 200 lbs (must not be used at UWM)
The American National Standards Institute (ANSI) requires that a duty rating sticker be placed on the side of every ladder so users can determine if they have the correct type ladder for each task/job.
Use a fiberglass ladder if there is a possibility of working near electricity or overhead power lines. Fiberglass is electrically non-conducive. Fiberglass ladders are also strong and lightweight, but they are not impervious to the elements. Users should check fiberglass ladders for signs of damage such as discoloration or cracks before using.
Inspect Ladder Prior to Use:
Always check for damage prior to using any ladder.
- Make sure feet are not broken or malfunctioning and that the slip-resistant pads are secure.
- Inspect the ladder for cracks, bends and splits on the side rails, rungs and steps.
- Make sure both rung locks are working properly.
- Test the rope and pulley. Examine the rope for any signs of fraying. Make sure the pulley is operating smoothly.
- Ensure all bolts and rivets are secure.
- Make sure the ladder is free of foreign materials such as oil and grease.
- If using a stepladder, make sure the spreader braces are secure and working properly.
- Aluminum or steel ladders should be inspected for rough burrs and sharp edges.
Proper Use of Ladder:
Always follow the manufacturer’s recommendations for proper use of the ladder. Before starting work, check that the safety feet are positioned properly to prevent slipping. Always place the ladder on a stable surface, clearing debris if necessary. Make sure the ladder steps are clean and dry and that there are no damaged steps. Check the ladder spreaders and make sure they are locked in place. Wear shoes with slip-resistant soles.
Set–up carefully:
- Use a barricade or guard if you will be working in an area with pedestrian traffic to avoid collisions
- Lock or block any nearby door that opens in toward you
- Keep area around base of ladder clutter-free
- Make sure the base of the ladder rests on a solid surface
- Position a straight ladder at a 4 to 1 ratio (base of ladder should be 1’ away from the vertical surface for every 4 feet of the ladder’s length to support you)
- Avoid shifting by tying your ladder down as close to the support point as possible
- Always raise extension ladders so that the upper section overlaps and rests on the bottom section. The upper section must always overlap on the climbing side of the extension ladder.
Make sure the ladder is long enough for the job. Climb only as high as the 2nd tread from the top on a step ladder and the 3rd rung from the top on a straight ladder. When working on a roof, the ladder should extend 3’ beyond the support point. When using an extension ladder, place the ladder top so that both rails are fully supported. The support area should be at least 12″ wide on both sides of the ladder.
Hold onto the ladder carefully, ensuring that you don’t reach out too far to either side. Don’t try to move a ladder while you’re on it. If the ladder is not positioned properly, climb down and reposition the ladder closer to your work.
Face the ladder when ascending or descending, keeping your body centered between the rails. Both hands should be placed on ladder rails, not on rungs, maintaining a firm grip when ascending and descending. Maintain 3-point contact at all times. This means that both feet and one hand or one foot and both hands must be in contact with the ladder at all times. If you’re using tools, raise and lower them with a hand line or use tool belt.
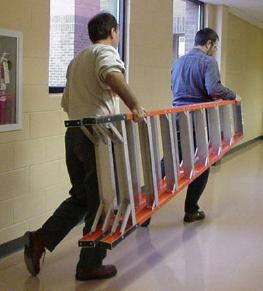
Do not sit on the ladder and never sit or stand on the top cap of a step ladder – it is not designed to carry your weight. Make sure that you transport the ladder properly. Ladders should be carried parallel to the ground.
Extension ladders should have proper overlap, depending on their length.
- Three foot overlap for 32-foot ladder
- Four foot overlap for 32- to 36-foot ladder
- Five foot overlap for 36- to 48-foot ladder
- Six foot overlap for 48-foot ladder
When using an extension ladder, always lower the ladder before carrying or moving it. Because long ladders can be unwieldy, whenever possible have someone help carry and set up the ladder.
Never push or pull anything sideways while on a ladder. This puts a side load on the ladder and can cause it to tip out from under you.
Lockout/Tagout (LOTO)
“Lockout/Tagout (LOTO)” refers to specific practices and procedures to safeguard employees from the unexpected energization or startup of machinery and equipment, or the release of hazardous energy during service or maintenance activities.
This requires that a designated individual turns off and disconnects the machinery or equipment from its energy source(s) before performing service or maintenance and that the authorized employee(s) either lock or tag the energy-isolating device(s) to prevent the release of hazardous energy and take steps to verify that the energy has been isolated effectively.
UWM employees and students involved in the LOTO program must be given training. Periodic inspections of the use of the procedures must be conducted to ensure continued effectiveness of the program.
Other Resources:
- Controlling Electrical Hazards, OSHA
- NIOSH Alert: Preventing Worker Deaths from Uncontrolled Release of Electric, Mechanical and Other Types of Hazardous Energy
- OSHA LOTO Information
- OSHA Lockout/Tagout Tutorial
Background:
This lockout / tagout (LOTO) program is intended for all departments at UWM. Departments may modify this program or develop their own written program to meet individual departmental needs.
The purpose of this program is to identify the procedures necessary to shut down and lock out or tag out machines and equipment where the unexpected energizing or start-up of the equipment or release of energy could cause injury.
Hazardous energy appears in the workplace in the form of electrical, mechanical, pneumatic, hydraulic and thermal energy and includes chemical, water, steam and gaseous energy systems. Lockout/Tagout procedures prevent the unexpected release of potential or stored energy that could cause injury while working on equipment. OSHA estimates that nearly 2% of all deaths in the workplace would be affected by adherence to this rule.
The program is applicable whenever employees (students) install, repair, set up or service equipment or machinery, or if employees are required to remove or bypass a guard or safety device.
The program requires that employees receive training and requires that periodic inspections be conducted to maintain and enhance the program.
Responsibility for Compliance:
Departments are required to implement a LOTO program. A majority of the hazardous energy sources on campus are either the responsibility of Facility Services or Auxiliary Services (e.g., Sandburg and Union operations).
Academic departments need to implement a program and incorporate students where applicable.
Directors, chairs or their delegate are responsible for determining which activities involving the use of hazardous energy sources are subject to and performed in accordance with the requirements of this program and applicable regulations. Principal investigators are responsible for activities in their assigned areas/program. These responsibilities include:
- Identify all machinery, equipment or processes subject to this program.
- Identify “authorized” and “affected” employees.
- Ensure that all authorized and affected employees receive proper training on the LOTO Program.
- Where applicable, develop, document and utilize written energy control procedures for each potentially hazardous energy source.
- Ensure all new and refurbished equipment is capable of accommodating lockout devices.
- Provide ongoing funding of the LOTO Program.
University Safety & Assurances in Conjunction with Facility Services will:
- Develop and maintain this written program which complies with the minimum requirements of OSHA and DSPS.
- Assist in employee training.
- Assist departments in identifying hazardous energy sources and choosing of proper LOTO methods.
- Perform periodic inspections to ensure compliance with program goals and objectives.
All Authorized and Affected Employees are required to:
- Follow LOTO procedures.
- Lockout/tagout or provide machine guarding.
- Not start, energize or use equipment, machines or processes that are locked out or tagged out.
- Identify hazardous energy sources and report these to their supervisor.
Questions regarding the UWM LOTO Program shall be directed to your immediate supervisor. In some cases assistance from other shops or departments may be necessary.
Concerns or incidents regarding the UWM LOTO Program shall be reported to your immediate supervisor or safety committee. Incidents shall be reviewed by your supervisor and/or the Safety Committee. Where necessary, corrective follow-up action or modification of the program shall be implemented.
Training Requirements:
Training requirements are specified in OSHA CFR 1910.147(c)(7) The Control of Hazardous Energy (lockout/tagout)
Employees shall be informed about the LOTO program requirements at initial hire and periodically thereafter.
Individual departments shall provide training to ensure that the purpose and function of the LOTO program are understood by employees (students) and that the knowledge and skills required for the safe application, use and removal of the energy controls are acquired.
Retraining shall be provided for employees whenever a change in their job assignments, a change in machines, equipment or processes present a new hazard, or when there is a change in the energy control procedures.
Additional retraining shall also be conducted whenever a periodic inspection reveals or whenever the department (employer) has reason to believe that there are deviations from or inadequacies in administrative practices or the employee’s knowledge or use of the energy control procedures.
The retraining shall reestablish employee proficiency and introduce new or revised control methods and procedures, as necessary.
General Requirements of the LOTO Program:
- Basic Requirements:
- Before the work phase of operation begins, an activity hazard analysis shall determine whether an employee may be exposed to unplanned releases of energy, hazardous material or unguarded machinery.
- Supervisors shall provide single and/or multi-locking devices, tags and other items needed to comply with the program such as lockout hasps, circuit breaker lockouts, etc.
- If employees have questions about their safety during lockout or tagout of equipment, they shall consult their supervisor.
- Procedures for Lockout and Tagout of Equipment:
- Equipment that might inadvertently release energy or hazardous material when turned on, and consequently cause injury, shall be locked out and/or tagged out.
- Departments shall establish a system for employees to obtain locks, multi-locking hasps, tags and other LOTO devices. Employees shall be instructed of these procedures. Departmental representatives and specific departmental information includes:
- Physical Plant Services-Shops: a LOTO kit including personalized tags shall be issued at time of hire. Additional or replacement tags may be obtained through Physical Plant Services.
- Power Plant: Steve Verish / Robert Zwickey
- Sandburg: Beth Lobner / Todd Luebstorf / Robert Zembiniski
- Union: Mike Schmitt / Chelsea Handler
- Other administrative and academic departments: Programs are under development, please contact your instructor or supervisor.
- Each employee must identify his/her locks in an individual way (e.g., name, photo, etc.)
- A key to each lock issued to an employee shall be retained by the employee; the only other key shall be in the care of a supervisor and stored in a secure location.
- Employees shall request assistance from their supervisor if they are not sure how to lock out equipment.
- Departments shall identify which pieces of equipment need specific lockout procedures.
Reminder: Power or energy isolation control by locking out is the most accepted method of safety control [OSHA 29 CFR 1910.147(a)(l)(c)(2)(ii)].
- Lockout of Power Sources:
- Equipment and machinery including valves, flanges, switches, and similar items shall be locked out at the point of control, for example, at the switch box or valve. If it cannot be locked out at the point of control, it shall be locked out at the next feed source of energy supply.
- Cord and Plug Connections:
- The UWM LOTO program does not apply to work on cord and plug connected electrical equipment when the employee performing the service or maintenance has exclusive control of the plug.
- Cord and plug connections that are out of sight shall be locked out at the energy source (for example, the breaker or disconnect feeding), and the employee’s tag or lock shall be applied to the plug end of the cord.
- After a power or energy source is locked out, the employee shall ensure by test or other allowed method that the energy source is isolated.
- When two or more employees are working on the same equipment, each employee shall attach his or her personal lock to the lever, valve, switch, or disconnect (off) switch. An adapter or multi-locking device may be used to attach one or more locks to a single control mechanism.
- An employee who is assigned to work on locked-out equipment shall place his or her lock and tag on the equipment and determine that there is no power to the equipment. Employees shall also check with others on the site about the status of the machinery if necessary.
- Where necessary, employees shall arrange for jacks, blocks, or other safeguards to be in place along with the lockout.
- Removing Locks and Tags and Restoring Power:
- An employee shall remove only his or her own lock. When the work is completed, the equipment should be operable when the last lock is removed.
- Power may be turned on to test or adjust the equipment. Each employee who has a lock attached to the equipment shall be advised of the potential danger before removal of his/her lock. All affected employees shall reattach locks after the equipment is tested or adjusted, unless the unit is ready to return to service.
- Before removing the last lock from locked-out equipment the employee shall ensure that:
- All guards have been replaced;
- Equipment, machine, or process is cleared; and
- Appropriate personnel are notified of power being restored.
- Equipment Locks:
- An equipment lock is used to replace employee lock(s) when equipment is to be locked out for an extended period.
- Equipment locks and tags are issued by supervisors. Except for the markings, they are the same type of locks as those issued by the authorized employee. The name of the employee placing the lock on the equipment and the name of the authorizing supervisor shall be indicated on the equipment lock and/or accompanying tag.
- Equipment locks must be identified by a recognized marking; an accompanying danger tag shall indicate why the equipment is locked out.
- Before the supervisor removes the lock from the locked-out equipment, he or she shall ensure that:
- All guards have been replaced;
- Equipment, machine, or process is cleared; and
- Appropriate personnel are notified of power being restored.
- Requirements for Removing Another Employee’s Lock:
- Departments shall establish a plan for removing the lock of an employee who is absent.
- When the authorized employee who applied the lockout or tagout device is not available to remove it, that device may be removed by the employer using a master key provided that the following conditions are met:
- Verification by the employer that the authorized employee who applied the device is not at the facility.
- Make all reasonable efforts to contact the authorized employee to inform him/her that his/her lockout or tagout device has been removed.
- Ensure that the authorized employee has this knowledge before he/she resumes work at the facility.
- Before removing the lock, the manager or supervisor shall ensure that those working on the equipment know that it was previously locked out. The equipment shall be power-tested and inspected; all requirements shall be followed for restoring power.
- Control of Second Key:
- The person with the highest level of responsibility shall have a second key to employees’ locks.
- Keys to employees’ locks shall be kept in a secure location and made available only to the person with the highest level of responsibility on site. A record indicating that a second key has been removed shall be maintained on site. If a master key system is used with the second key system, the same control process shall apply.
- Tags:
- It is recommended that a tag stating DANGER-Do Not Operate, DANGER-Do Not Start, Do Not Open, Do Not Close, Do Not Energize or another appropriate warning be used along with the lock when equipment or machinery is locked out.
- Tags shall be placed to clearly identify the equipment of circuits being worked on.
- Tags shall be given the same level of respect and treatment as locks. However, please remember: Power or energy isolation control by locking out is the most accepted method of safety control since tags are warning devices which can be easily removed, bypassed, obscured or ignored.
- Contractor Relations:
- Contractors and vendors who perform work at UWM must adhere to minimum OSHA requirements.
- The LOTO program shall be explained to contractors working at UWM. Contractors shall also inform UWM of their own LOTO procedures. UWM employees and contractors shall work cooperatively to ensure compliance with LOTO goals.
- Exceptions / Exclusions:
- An exception to the LOTO program may be exposure to electrical hazards from work on, near or with conductors or equipment in electrical utilization installations. Only qualified and authorized employees (e.g., electricians) shall be permitted to engage in such situations or operations.
- An exception to the LOTO program may be minor tool changes and adjustments which take place during normal production operations if they are routine, repetitive, and integral to the use of the equipment provided that the work is performed using alternative measures which provide effective protection.
- A written procedure need not be developed for a particular machine or equipment, when all of the following elements exist:
- There is no potential for energy to be stored or re-accumulated after the shutdown.
- There is a single, readily identifiable source of energy isolation, and the isolation completely de-energizes the equipment.
- The machine is locked out during service.
- Application of a single lockout device provides a complete lockout condition.
- The lockout device is under the exclusive control of the employee performing the work.
- The maintenance or service does not itself create a hazard to other employees.
- There have been no accidents or incidents involving the unexpected activation of machines during service or maintenance.
- Definitions:
- Activity Hazard Analysis:
- Risk assessment or hazard analysis performed for a specific task.
- Affected Employee:
- An employee who is required to use machines or equipment on which servicing is performed under the OSHA Lockout/Tagout standard or who performs other job responsibilities in an area where such servicing is performed.
- Authorized Employee:
- An employee who locks or tags machines or equipment in order to perform servicing, maintenance, inspection, etc.
- Energy Control Device:
- A mechanical device that physically prevents the transmission or release of energy, including but not limited to the following: A manually operated electrical circuit breaker; a disconnect switch; a manually operated switch by which the conductors of a circuit can be disconnected from all ungrounded supply conductors and, in addition, no pole can be operated independently; a line valve; a block; and any similar device used to block or isolate energy. Push buttons, selector switches and other control circuit type devices are not energy isolating devices.
- Energized:
- Machines and equipment are energized when they are connected to an energy source or they contain residual or stored energy.
- Energy Source:
- Any source of electrical, mechanical, hydraulic, pneumatic, chemical, thermal, or other energy.
- Lockout:
- The placement of a lockout device on an energy-isolating device, in accordance with an established procedure, ensuring that the energy-isolating device and the equipment being controlled cannot be operated until the lockout device is removed.
- Other Employees:
- All employees who are or may be in an area where energy control procedures may be utilized. This may include contractors or other building occupants such as faculty and students.
- Primary Authorized Employee:
- A person designated to exercise primary responsibility for the implementation and coordination of LOTO in a given scenario.
- Residual Power:
- Energy which is retained in a system, machine or unit when the supply line disconnect is placed on the OFF position. Power capacitors and electric or magnetic fields are examples that may have residual power if not properly dissipated.
- Residual Pressure:
- The differential pressure remaining within a component after the pressure source is closed off.
- Tagout:
- The placement of a tagout device on an energy-isolating device, in accordance with an established procedure, to indicate that the energy-isolating device and the equipment being controlled may not be operated until the tagout device is removed.
- Tagout Device:
- Any prominent warning device, such as a tag and a means of attachment, that can be securely fastened to an energy-isolating device to indicate that the machine or equipment to which it is attached may not be operated until the tagout device is removed.
- Activity Hazard Analysis:
References:
- OSHA 29 CFR 1910.147, The Control of Hazardous Energy (lockout/tagout)
- U.S. Department of Energy, Construction Safety Reference Guide (DOE/ID-10447), 1993.
Machine Shop and Hand/Power Tool
Moving machine parts have the potential to cause severe workplace injuries. Crushed fingers or hands, amputations, burns, or blindness can be prevented through machine safeguards. Simply put, any machine part, function, or process that may cause injury must be safeguarded.
Responsibilities
Supervisors are responsible for:
- Ensuring employees or other equipment users have received appropriate training on this program and machine-specific use of guards
- Ensuring that equipment users maintain and use guards appropriately
- Removing equipment from service if guards not in place or damaged (lockout/tagout, if possible)
Employees or other equipment users are responsible for:
- Completing machine guarding training
- Following the training for use of guards
- Ensuring guards are in place and in working order on moving equipment prior to use
- Removing equipment from service if guards not in place or damaged (lockout/tagout, if possible)
- Reporting missing or altered guards to supervisor
University Safety and Assurances is responsible for:
- Maintenance of this program
- Providing resources for training of UWM employees and users of equipment with guards
Where Mechanical Hazards Occur
Dangerous moving parts in these three basic areas need safeguarding:
Point of Operation is the area where work is being done on a material, such as cutting, shaping, boring, or forming of material.
Power Transmission Apparatus is the area of the mechanical system that transmits energy to the parts of the machine performing the work. These components include flywheels, pulleys, belts, connecting rods, couplings, cams, spindles, chains, cranks, and gears.
Other Moving Parts include all parts of a machine that move while the machine is operating. These parts can be rotating, reciprocating, or transversing. Feed mechanisms and auxiliary parts of the machine are considered other moving parts as well.
Hazardous Mechanical Motions and Actions
Many mechanical motions and actions present hazards to the worker. The following types of motions and actions are common to nearly all machines and recognizing them and their danger is essential to worker protection.
Motions Include:
Rotating: Rotating parts are dangerous because they can grip clothing or skin forcing an arm or hand into a dangerous area.
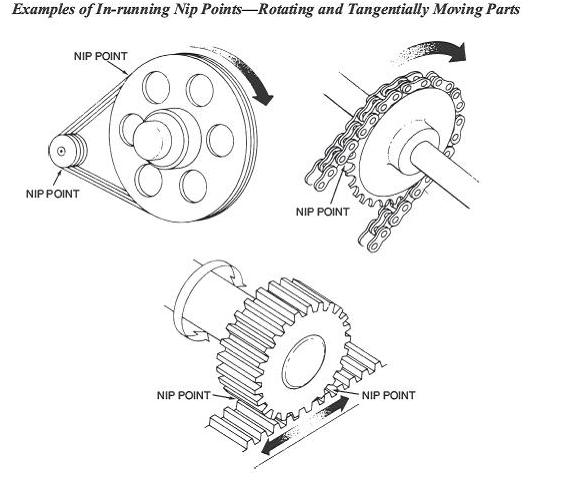
Reciprocating: Reciprocating motions are dangerous because a worker may be struck or pinned during the back and forth or up and down motion.
Transverse: Transverse motion is movement in a straight continuous line. The danger in transverse motion lies in the possibility of a worker getting caught in a pinch point or dragged by the part itself.
Actions Include:
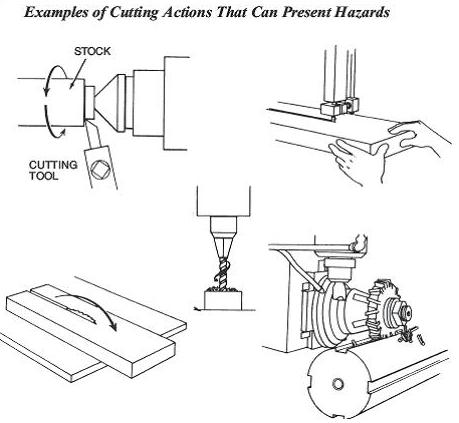
Cutting: The cutting action may involve all three motions and is dangerous at the point of operation. While the cutting action can be dangerous to fingers, limbs, torso and head, flying chips or debris pose a serious danger to the eyes and face.
Punching: The punching action results when pressure is applied to the ram for the purpose of stamping metal or other materials. The danger occurs at the point of operation when the material is inserted, held and withdrawn by hand.
Shearing: Shearing action involves applying power to a slide or knife to trim or shear metal or other materials. Like the punching actions, the hazard occurs at the point of operation.
Bending: The bending action occurs when power is applied to a slide to draw or stamp metal or other material. The hazard occurs at the point of operation, similar to punching and shearing.
Safeguard Requirements
In order to protect the machine operator, safeguards must meet minimum general requirements.
Prevent contact: The safeguard must prevent hands, arms, and any other part of an operator’s body from making contact with dangerous moving parts. A good safeguarding system eliminates the possibility of the operator or another worker placing parts of their bodies near hazardous moving parts.
Secure: Operators should not be able to easily remove or tamper with the safeguard because a safeguard that can easily be made ineffective is no safeguard at all. Guards and safety devices should be made of durable material that will withstand the conditions of normal use. They must be firmly secured to the machine.
Protect from falling objects: The safeguard should ensure that no objects can fall into moving parts. A small tool dropped into a cycling machine could easily become a projectile that could strike and injure someone.
Create no new hazards: A safeguard defeats its own purpose if it creates a hazard such as a shear point, a jagged edge, or an unfinished surface that could cause a laceration. The edges of guards, for instance, should be rolled or bolted in such a way to eliminate sharp edges.
Create no interference: Any safeguard that impedes an operator from performing the job quickly and comfortably might soon be overridden or disregarded. Proper safeguarding may actually enhance efficiency since it relieves the operator’s apprehensions about injury.
Allow safe lubrication: If possible, workers should be able to lubricate the machine without removing the safeguards. Locating oil reservoirs outside the guard, with a line leading to the lubrication point, will reduce the need for the operator or maintenance operator to enter the hazardous area.
Methods of Machine Safeguarding
There are five general methods of safeguarding machinery and equipment: guards, devices, location, feeding/ejection methods, and miscellaneous aids. Always choose the most effective and practical means available.
1. Guards
Guards prevent the operator from physically reaching around, under, or through the danger area. In general, there are four different types of guards.
Fixed Guards are a permanent part of the machine that does not depend on moving parts to perform its function. This guard is usually preferable to other types of guards because it is relatively simple, yet difficult to remove. Fixed guards are best used to protect workers from the power transmission apparatuses.
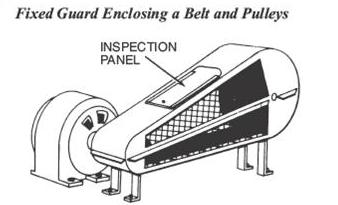
Interlocked Guards are a type of guard that if opened or removed, will automatically shut off or disengage the machine. The machine cannot cycle or be powered until the guard is back in place, but replacing the guard will not automatically restart the machine.
Adjustable Guards are useful because they allow flexibility in accommodating various sizes of material. However, because they require adjusting, they are subject to human error.
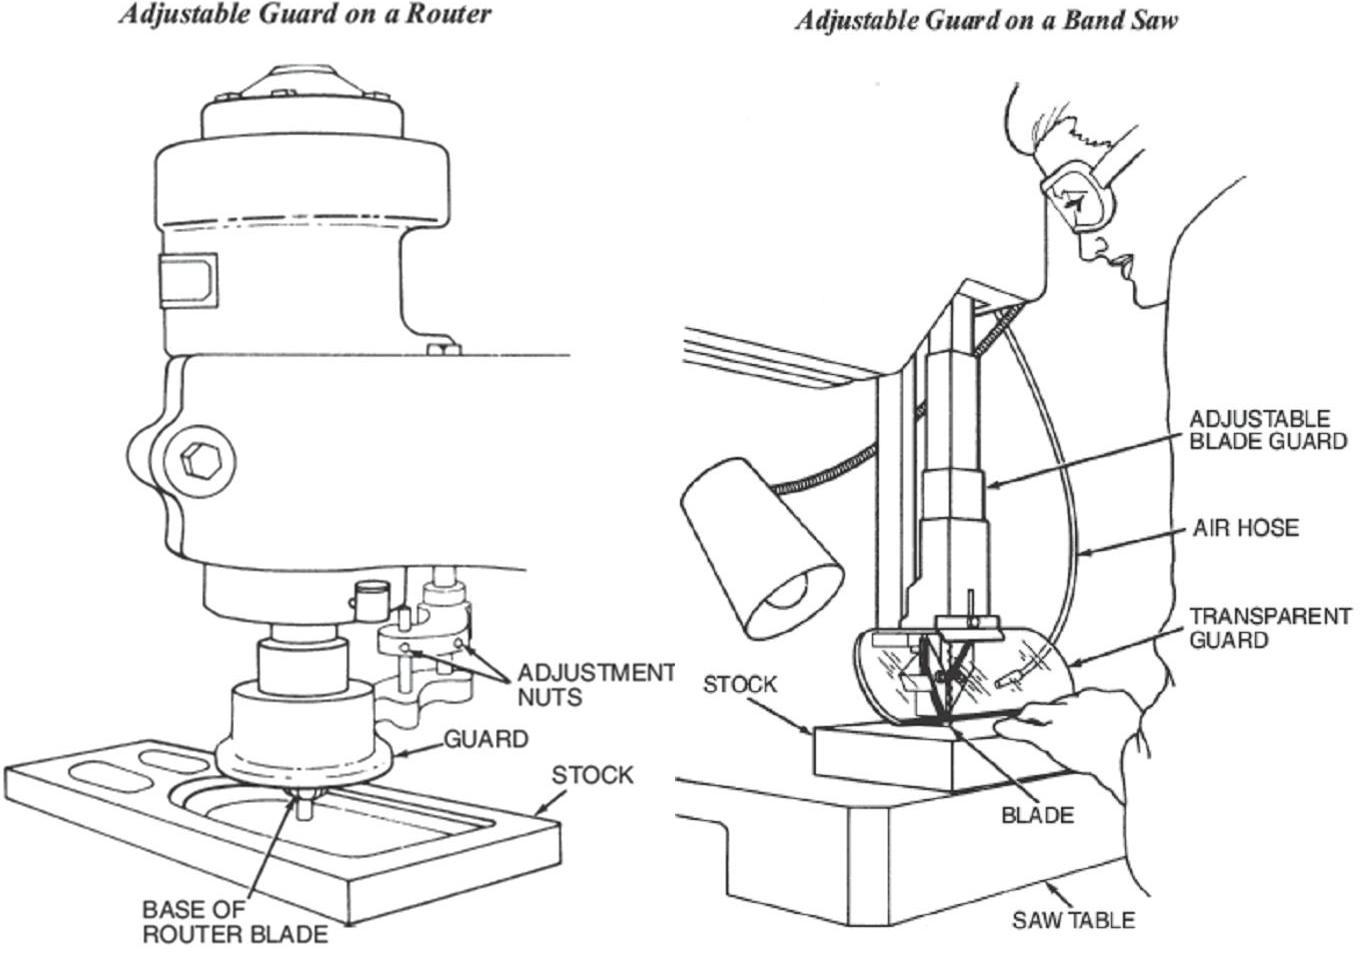
Self-Adjusting Guards allow the barrier to open and close depending on the size and movement of the material. As the material is moved into the danger area, the guard is pushed away, which provides an opening only large enough to accommodate the material. When the material is removed, the guard returns back to the rest position.
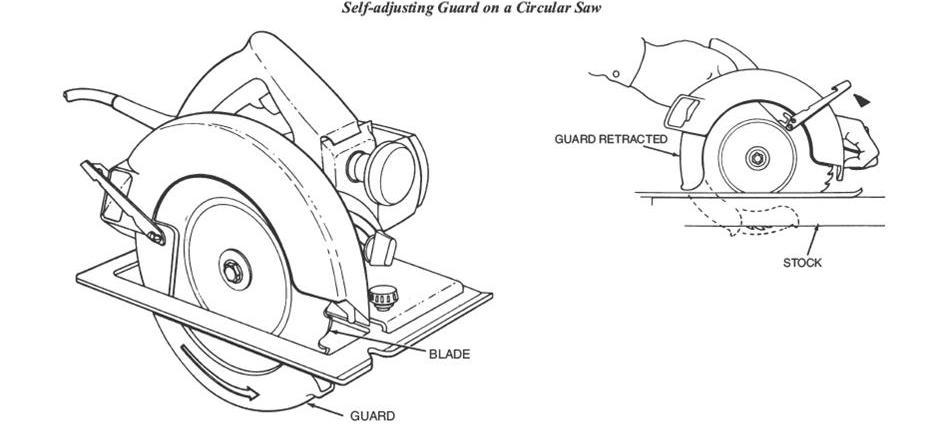
Guard Construction
Many machine builders (manufacturers) provide point of operation and power transmission safeguards as standard equipment. Guards designed and installed by the builder are preferred because they usually conform to the design and purpose of the machine. However, when this is not possible, user-built guards may be necessary. Although that is not the preferred way of guarding, it does have its advantages.
User-built guards may be the only option for older machines that never had guard specifications. These guards can be designed to fit unique situations such as older or specially made machines. Also, the design and installation of user-built guards by work place personnel can help promote safety awareness among workers.
Although there are many advantages to user-built guards, they do come with some disadvantages. The main problem is the risk of poor design and execution. These guards may not conform to the machine making operations impractical. Also, altering the machine to accommodate guards may harm the integrity of the machine causing new hazards. Always make sure user-built guards are only made and installed by a professional who has done a thorough hazard analysis.
Power Transmission Apparatus Guards need no opening for feeding material, unlike point of operations guards. Because of this, power transmission guards should cover all moving parts in such a way that no part of the operator’s body can come in contact with them. The only openings necessary for these guards are those for lubrication, adjustment, repair, or inspection. These openings are covered and fastened in a way that they can only be removed using tools.
Point of Operation Guarding may call for more user-built guards because of the complexity and different uses these machines have. For these reasons, not all machine builders provide point of operation guards for their products.
Distance of Guards from Point of Operation
The diagram below shows the accepted safe openings between the bottom edge of the guard and the feed table at varying distances from the point of operation (danger line).
Danger line is the point of operation and location of moving parts.
Clearance line marks the distance needed to avoid contact between the guard and moving parts at the danger line.
Minimum guard line is the distance between the opening of the guard in order to feed material and danger line (1/2 inch).
The various openings are such that an operator’s fingers (average hand size) will not reach the point of operation.
2. Devices
Devices are used when barrier guards are not practical. For example, when access to feed points or ejection of parts is required, a barrier guard would not be used because nothing would be able to pass through it. Safeguard devices may operate through the following ways:
Presence Sensing devices may use different methods of light, radio frequency, or electro-mechanical systems to shut off a machine if a worker enters the danger area. These devices are only to be used if the machine can be stopped before the worker enters the danger area.
Physical Restraint devices keep the operator from reaching or walking into the danger area. This is done by attaching a cable or strap to the operator’s hand or body allowing only a certain range of motion. If the operation involves placing material into the danger area, hand-feeding tools are often necessary.
Pullback devices are similar to restraint devices in that they use a series of cables attached to the operator’s hands, wrists, or arms. When the machine’s slide or ram is up and not in the danger area, there is slack in the cable allowing the operator to access the point of operation. When the slide or ram begins to descend, the cables tighten, which withdraws the operator’s hands from the danger area at the point of operation.
Safety Control devices provide a quick means for shutting down a machine in an emergency situation. Common safety controls include trip devices such as pressure-sensitive body bars, trip-rods/tripwires, and two-hand controls.
Pressure Sensitive Body Bars will deactivate a machine when pressure is applied. If the operator trips, loses balance, or falls toward the machine, the body will apply pressure to the bar and the machine will stop. Because of this, the position of the bar is very important.
Safety Triprods and Wires will deactivate a machine when pressed or pulled by hand. Because these are used in an emergency situation, they must be within reach of the operator around the perimeter of the danger area.
Two-hand Controls require constant, simultaneous pressure by both of the operator’s hands for the machine to run. With the operator’s hands on the control buttons, they are a safe distance from the danger area and when one of the hands eases pressure, the machine will shut down.
Gates are movable barriers that protect the operator at the point of operation before the machine can be started. If the gate is not permitted to fully close, the machine will not be able to function.
3. Location
Location is a method of safeguarding that involves locating the machine or the dangerous components of the machine so they are not accessible to the operator or other workers. By doing this, the worker can maintain a safe distance from the danger area while still operating the machine. This can be done by placing the dangerous moving parts against a wall or fence so the worker cannot enter the danger area.
4. Feeding and Ejection Methods
Many feed and ejection methods do not require the operator to place their hands in the danger area. Once the machine is set up and the material is loaded, there may be no operator involvement at all. In other instances where a manual feed is necessary, a feeding mechanism can assist the operator to ensure distance from the danger area. Please note that using feed and ejection methods do not eliminate the need for guards and devices. Guards and devices must be used whenever they are necessary.
5. Miscellaneous Aids
Machine safeguards and devices are the best way to protect workers from mechanical hazards, which could result in severe injury or death. However, there are some devices and strategies that, although not providing complete protection, may provide an extra margin of safety to the operator.
Awareness Barriers do not provide any physical protection, but act as a reminder to a worker that they are approaching a danger area. An awareness barrier such as a rope with a caution sign is generally not as effective in areas where continual exposure to hazards exist.
Protective Shields in a simple form are transparent barriers attached to a machine that are mainly used to provide protection from flying debris, splashing oils, and coolants.
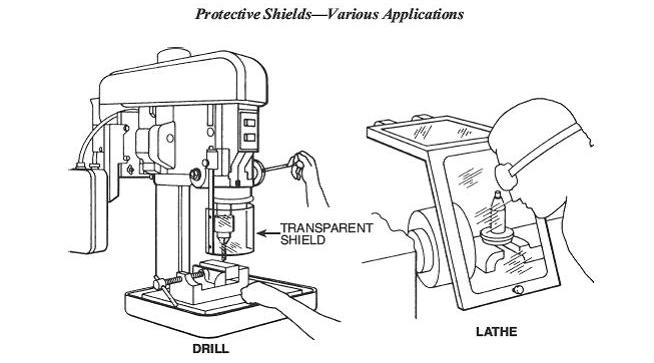
Hand-Feeding Tools can be used when it is necessary for an operator to feed or remove a material without the use of a feed or ejection mechanism. For example, using a push stick or block to feed wood into a saw blade is much safer than using one’s hands.
Administrative Controls include training, supervision, and procedural measures to safeguard individuals from mechanical hazards. Even the best safeguarding system cannot work effectively unless the worker knows how and why to use it. Specific and detailed training is an essential part of the safeguarding process. Training programs should include:
- Identification of hazards associated with individual machines
- The safeguards and how they provide protection from hazards
- How the safeguards are to be used
- When the safeguards should be removed
- What to do if a safeguard is missing, damaged, or inadequate
Personal Protective Equipment (PPE) should be worn whenever possible to provide an extra measure of protection to the worker, even though engineering controls (guards and devices) take precedence in protecting workers from injury. In order to provide adequate protection, PPE should be chosen and worn according to a particular hazard. It should also be stored properly to be kept clean and in good condition.
Although PPE is intended to provide extra protection to the worker, it can create hazards of its own. For example, protective gloves and sleeves may get caught in rotating parts causing injury to the worker. Consult with your supervisor when selecting PPE for specific operations.
Non-mechanical Hazards
This site concentrates on safeguarding mechanical motions and the hazards they present; however, there are other hazards that should not be ignored. These hazards include:
Electrical hazards are present when using electrically powered or controlled machines. The electrical systems should be properly grounded and damaged or exposed wires should be replaced to protect the operator from electric shocks.
Noise can create numerous hazards including hearing loss, pain, nausea, fatigue, and emotional distress. Engineering controls like sound reducing material should be used if practical. Also, hearing protection such as ear plugs or muffs should be used if engineering controls are not an option.
Hazardous Materials may be required for machines to operate properly or to complete a process. Materials such as cutting fluids, coolants, and lubricants may cause skin irritation, blindness, or serious illness. Some materials may give off harmful fumes when heated. Workers should always wear appropriate PPE when dealing with hazardous materials. Machines that give off fumes should be used in a vented area. Also, safety data sheets (SDSs) must be available in an emergency situation.
Training
Through this site and links associated with this site, employees should understand general machine guarding practices well enough to successfully complete the training quiz below. This site provides general information about the UWM Machine Guarding Program; however employees should receive additional training from their supervisor on machines or equipment specific to their area.
Training Course
Additional Resources:
- Concepts and Techniques of Machine Guarding , US Department of Labor
- OSHA Machine Guarding: eTool
- OSHA Machine Guarding: Safety and Health Topic Page
- OSHA Guarding of Portable Powered Tools (29 CFR 1910.243)
Office Safety
Background
In response to the ergonomic concerns of the office work environment, the American National Standards Institute (ANSI) published voluntary standards for office workstations. These standards address the pertinent issues relating to office work station design in the effort to increase worker comfort and productivity. The recommendations of ANSI are summarized below and should be tailored to specific work station situations.
General Work Environment
Lighting:
Proper lighting is critical for a comfortable and productive workstation. The optimal light level will depend on the task at hand. Consider using moveable task lighting. Too much light can be as visually fatiguing as too little. The best level of luminescence for video display terminal (VDT) work that also uses paper documents is 300-400 lux (30-40 foot candles). If paper documents are not used, the level of luminescence should be 200 lux (20 foot candles) or lower.
Lighting should not ruin image quality. The work station should be arranged so that the operator does not face an unshielded window or a bright light source. The orientation of the video screen should be perpendicular or nearly perpendicular to the line of windows.
Outside light should be controlled by drapes, dark film, blinds or louvers to minimize screen glare. Intense overhead lighting or task lighting may produce glare as well. Louvers for overhead illumination generally improve lighting quality by reducing glare. Screen filters may be useful to reduce unwanted reflections.
Generally, desktops with matte finishes or darker desktops are less visually fatiguing than those with reflective finishes, or lighter ones.
In summary, the orientation and angle of the screen, controlling natural and artificial light sources, effective use of task lighting, and adjusting the screen’s brightness and contrast controls are the surest ways to minimize glare and reduce eye fatigue.
Background Noise:
Ambient sound levels should not be higher than 55 decibels (dBA).
Temperature and Humidity:
Temperature and humidity should be within comfortable ranges. A relative humidity level between 40 and 60% is generally desirable for most workers in office environments.
VDT Considerations

The Department of Administration poster entitled “Working Safely With Video Display Terminals” is a quick and easy guide to some common workstation problems and their solutions.
Keyboards should be placed in an optimum location. Many keyboards have angle adjustment tabs. Changing the keyboard angle may contribute to typing comfort as well.
There are a number of ergonomically designed keyboards available and you should try several different types before deciding on which may be the most comfortable for you.
Screen brightness, contrast, and color combinations should be selected by the operator for optimal viewing comfort. Check the program specifications to determine if color combinations can be altered. These adjustments can have a profound impact on viewer comfort and productivity.
Display images on the screen should appear stable and free of any distortion flicker, or jitter. Blinking screen characters or the cursor may contribute to eye fatigue. If adjustable, blinking characters should not vary at more than 2 hertz (2 cycles per second).
See “Computer Vision Syndrome” from the American Optometric Association for additional information on eye discomfort and/or visual problems associated with VDTs.
Comfortable viewing distance from the eye to the screen is 15 to 40 inches. This should be adjustable by the operator. Often VDT screens are arranged too high, forcing the operator to tilt the neck severely backward causing neck pain. It is recommended that the center of the screen be 10-25 degrees below eye level.
The VDT should tilt about 5 degrees forward to about 15 degrees backward to help eliminate screen reflections and maximize viewer comfort.
Source documents should be located at or near the same distance as the screen. A document holder may be useful for data entry and dialogue tasks. It should be adjustable in height and angle of tilt.
A wrist rest or arm rest should be available for those who desire it. These devices can reduce static muscle loading and deviated wrist postures while keying. Hands and fingers should be relaxed while keying. There are also an assortment of padded mouse pads available.
Laptop Computers
The U.S. Center for Disease Control recommends against using laptops as primary computers unless they are used in a way consistent with neutral posture. Maintaining neutral postures will reduce stress and strain to the musculoskeletal system.
Furniture Considerations
Furniture should be able to accommodate the 5th percentile female through the 95th percentile male dimensions. These percentiles represent all but the smallest five percent of women and the largest five percent of men. To accomplish this, furniture should be adjustable or there should be a selection of furnishings to choose from. The seat height, heights for the equipment (keyboard and other working surfaces), and the height for the display should be adjusted to personal taste. Also, take into consideration the four critical points of support for the operator’s body: a wrist rest for the hands; seat pan for the buttocks; a short rest, usually called an elbow rest; and back support. For worker comfort, important postural angles are the angles of the elbow and knee, and the angle of the seat back. As a general rule, the workstation should provide maximum flexibility of components. The items listed below should also be taken into consideration when designing the office work station.
Table Top:
The working space should be large enough to accommodate all task materials in addition to the VDT. All materials should be within easy reach.
Fixed tabletops for typing should be about 27 inches high; for other tasks, it should be about 29 inches high.
The space for the legs and feet under the table should be at least 27 inches wide and 27 inches deep.
Small “wells” or recessed areas for the keyboard are not recommended. These restrict keyboard placement.
Height adjustable tables with a single sided surface should be adjustable from 25-30 inches above the floor. For dual-platform height-adjustable tables, the keyboard platform should be adjustable from 25-30 inches above the floor, and the screen platform should range from 26 to 32 inches high.
Chairs:
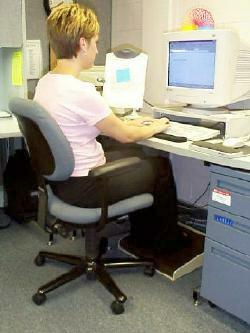
The seat pan should be height-adjustable through a range of 15-20 inches above the floor. If used by several operators, the chair should be easy to adjust.
The seat pan should be at least 16 inches wide, with a preferred width of 18-19 inches. The seat depth should be 15 to 18 inches. The seat pan should tilt backward between 0 and 7 degrees.
The angle between the seat pan and seat back should be 85 to 130 degrees.
Seat padding should not compress more than one inch when an individual is seated.
The lumbar support should be centered 6 to 10 inches above the seat pan. Ideally, the lumbar support should be adjustable.
The front edge of the seat should be rounded downward.
Arm rests should be at least 2 inches wide and should be located about 10 inches above the seat pan. Arm rests are generally recommended, but may be a hindrance if the user must get in or out of the chair frequently.
The chair should be fitted with casters if the task requires the operator to get up or move around the workstation frequently. A properly adjusted chair allows the operator to place both feet firmly on the floor when seated comfortably. If feet cannot be placed flat on the floor when seated, a footrest may be useful, although it is not necessary if both the table and the chair are height adjustable. Footrests should be approximately the same size as the seat pan of the chair, have a non-slip surface, and rest firmly on the floor.
Other Considerations
VDT operators should periodically take a break, stand up, stretch and change sitting positions. Work/rest schedules vary according to the job’s physical and psychological demands.
Visual targets should be located close to each other — at the same distance from the eyes and in about the same direction of gaze. If the visual targets are spaced apart in direction or distance, the eye must be continuously redirected and refocused while sweeping from one target to another. This may contribute to eye fatigue.
Proper eye wear is a critical factor in reducing eye fatigue. The person prescribing lenses should be aware that VDT work is involved and know the range of distances encountered. Optical prescription single-vision or focal length lenses designed for computer use are available through vision care specialists.
Be creative. There are many easy and inexpensive solutions that will make the work station more comfortable and productive.
Personal Protective Equipment (PPE)
Head and Foot Protection
Other Resources:
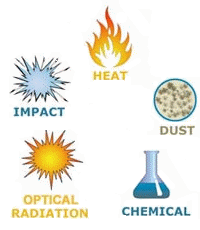
- Assessing the Need for Personal Protective Equipment: A Guide for Small Business Employers, OSHA Publication 3151-12R 2003
- OSHA Fact Sheet on Personal Protective Equipment
- Relevant OSHA Standards:
- Eye and Face Protection, OSHA 1910.133
- Respiratory Protection, OSHA 1910.134
- Head Protection, OSHA 1910.135
- Occupational Foot Protection, OSHA 1910.136
- Hand Protection, OSHA 1910.138
Policy on Eye Protection

The UWM policy on eye protection is the same as the State of Wisconsin policy on eye protection as defined by Wisconsin Department of Safety and Professional Services regulations SPS 332 Public Employee Safety and Health.
Specifically, SPS 332.15 adopts the OSHA standard for eye protection. The standard is entitled: Eye and Face Protection, 29 CFR 1910.133, and is a subpart of the regulations entitled Personal Protective Equipment. The standard itself is very brief. It is the interpretation of the standard that is most difficult.
Synopsis of OSHA Eye and Face Protection (29 CFR 1910.133):
General Requirements
- The employer shall ensure that each affected employee uses appropriate eye or face protection when exposed to eye or face hazards from flying particles, molten metal, liquid chemicals, acids or caustic liquids, chemical gases or vapors, or potentially injurious light radiation.
- The employer shall ensure that each affected employee uses eye protection that provides side protection when there is a hazard from flying objects. Detachable side protectors (e.g. clip-on or slide-on side shields) meeting the pertinent requirements of this section are acceptable.
- The employer shall ensure that each affected employee who wears prescription lenses while engaged in operations that involve eye hazards wears eye protection that incorporates the prescription in its design, or wears eye protection that can be worn over the prescription lenses without disturbing the proper position of the prescription lenses or the protective lenses.
- Eye and face PPE shall be distinctly marked to facilitate identification of the manufacturer.
- The employer shall ensure that each affected employee uses equipment with filter lenses that have a shade number appropriate for the work being performed for protection from injurious light radiation.
Laboratories and Studios:
Many governmental agencies and standards organizations have issued interpretations of this standard and the one that is followed by UWM’s Department of University Safety and Assurances is the interpretation offered by the American Chemical Society in their publication, Safety in Academic Chemistry Laboratories (ISBN 0-8412-3864-2).
The ACS states that “…the use of proper eye protection is required of everyone who enters a chemical work area. There is always a need for protection from splashes of toxic and/or corrosive chemicals and flying particles. Safety goggles that protect the top, bottom, front and sides of the eyes are mandatory. Neither spectacles with side shields nor safety glasses with side shields provide adequate protection from chemical splashes, because they do not fit firmly against the skin.”
The OSHA Laboratory Safety Standard, a performance-based standard, requires that a “hazard assessment” be performed if there is to be any deviation from the “default” rules.
There are, therefore, two options available to laboratory directors:
- Laboratory directors may choose to stick with the default rule by requiring all employees to wear eye protection whenever in the laboratory. There are hundreds of styles of safety eyewear on the market today, so finding a comfortable pair of goggles or other approved safety eyewear for employees and students should not be a problem.or,
- Laboratory directors may prepare and use a Laboratory Specific Chemical Hygiene Plan (CHP; as defined by OSHA/COMM) for each lab. As this is a nationally accepted and legally binding protocol, lab directors are inclined to accept the use of well-developed CHP’s in lieu of “one size fits all” plans.
When a Laboratory Specific Chemical Hygiene Plan is developed, the workers in each lab have an opportunity to develop customized safety procedures that make the most sense for their operations.
If they want to undertake certain procedures that require goggles, certain procedures that require safety glasses, or certain procedures or even areas of the lab where eyewear is optional, they can do this through the Chemical Hygiene Plan development process. Be aware, however, that the Chemical Hygiene Plan development process is not trivial.
Prescription Safety Glasses:
The State of Wisconsin has a mandatory contract for prescription safety glasses for all State of Wisconsin agencies. To initiate the process to receive prescription safety glasses, the employee’s supervisor must contact safety-office@uwm.edu to request the prescription safety glasses form. The supervisor should include the name of the employee needing glasses on the request. The authorization for ordering prescription safety glasses form can then be picked up at Engelmann Hall, Room 270. Employees must then take this form to one of the providers found at https://www.hi-techoptical.com/partners/wida/.
Face Shields:
Face shields alone are not considered adequate eye protection. Face shields do not protect from splashes or impact hazards as well as goggles or protective spectacles. Safety goggles or glasses shall be worn as primary protection with face shields as secondary protection for further head protection. The face shield should be wide enough and long enough to protect the face, neck, and ears of the wearer.
Other Resources:
- Eye and Face Protection Standard, OSHA 1910.133
- Guidelines For The Use of Contact Lenses in Industrial Environments, American Optometric Association
- Contact Lens Use in a Chemical Environment , NIOSH Current Intelligence Bulletin
- OSHA PPE Fact Sheet
Personal Protective Equipment: Gloves
General Information
Some of the hazards that threaten hand safety are skin absorption of harmful substances, chemical hazards, such as caustic material, solvents or cutting oils, cuts or lacerations; punctures; chemical burns; thermal burns; harmful temperature extremes; bacteriological, blood or other infectious materials; and musculoskeletal disorders.
Preventing Hand Injuries

When substitution of less hazardous materials and work practice controls fails to eliminate the risk of injury to hands, protective gloves are the primary means of protection.
Protective equipment includes gloves, hand pads, tapes and mitts. There are many types of gloves available and the challenge is to find the right glove for the job. The glove on the right illustrates what can happen when a particular chemical is incompatible with the glove being worn.
- Chemical Resistant Gloves:
- Butyl: High resistance to gas or water vapors. Also resists common acids and alcohols.
- Hot-Mill or Aluminized Gloves: Offer reflective and insulating protection. Generally used for welding, furnace and foundry work.
- Latex: Provide protection from most aqueous solutions of acids, alkalis, salts and ketones. They resist abrasions during grinding, sandblasting and polishing. These general-purpose gloves are pliable and comfortable. Used for common industrial applications, food processing, maintenance, construction and lab work.
- Natural Rubber: Liquid proof protection against acids, caustics and dye stuffs.
- Neoprene: Provides protection against hydraulic fluids, gasoline, alcohols, organic acids and alkalis. They offer good pliability and finger dexterity, high density, tensive strength plus high tear resistance.
- Neoprene Latex: Protection against detergents, salts, acids and caustic solutions.
- Nitrile/Natural Rubber: Provide protection from chlorinated solvents and are intended for jobs requiring dexterity and sensitivity. Nitrile/Rubber blend resists abrasions, cuts, tears and punctures.
- N-DEX Gloves: This nitrile glove provides splash and spill protection against a wide variety of chemicals, although it is not intended for extended immersion activities. It is available in low-power and powder-free options.
- Polyvinyl Alcohol (PVA) Gloves: Resist strong solvents such as chlorinated and aromatic solvents. This material is water soluble (polyvinyl alcohol) and cannot be used in water or water-based solutions.
- Polyvinyl Chloride (PVC) Gloves: Good for handling materials coated or immersed in grease, oil, acids or caustics. Resists abrasion. Can be purchased lined or unlined depending on dexterity requirements.
- Silver Shield Gloves: Protection against a wide range of solvents, acids and bases. This lightweight laminate is flexible, but not form-fitting, which affects user dexterity.
- Vinyl: Provides resistance to a variety or irritants.
- Viton: Provides resistance to PCBs, chlorinated and aromatic solvents, gas and water vapors. This glove material can be used in water-based solutions.
- Cotton or Canvas Gloves: General work gloves for parts handling, general maintenance. Provide abrasion resistance.
- Leather Gloves: Mild heat resistance and good abrasion resistance.
- Metal-Mesh, Kevlar, or Other Cut-Resistant Gloves: Protect against cuts and abrasions. Used for glass handling, metal fabrication, food processing applications, and handling other sharp tools or objects.
- Shock-Absorbing Gloves: Protect against repetitive pushing and pounding or extended contact and help lessen the effects of constant vibration.
When ordering gloves, be sure to order the proper size. Tight-fitting gloves can cause fatigue and be more vulnerable to tears. They can also cause increased perspiration. Loose-fitting gloves impair dexterity and are cumbersome and even hazardous around laboratory equipment. Rings with prongs and long fingernails can tear gloves made of thinner materials.
To select the proper glove when working with chemicals:
- Determine what chemical(s) will be handled. Review the Safety Data Sheet (SDS)
- Consider the degree of dexterity, gripping ability and ruggedness needed for the tasks to be performed.
- Review the chemical compatibility chart to determine breakthrough performance to determine the suitability of a glove for a specific application.
Visually inspect gloves each time they are worn and change them if they are cracked, peeling, torn, punctured or otherwise deteriorating. If there is any doubt about the integrity of the glove material, it should be discarded. Gloves can be leak-tested for defects difficult to see with the naked eye by trapping air in the glove, immersing it in a soap solution and squeezing it to pressurize.
Perspiration inside gloves softens the skin, making it more vulnerable to chemicals. This can be minimized by limiting the time gloves are worn (whenever possible), alternating pairs or using thin cotton gloves as replaceable inner liners. Some glove users experience a rash or an allergic reaction from the powdered coating inside certain gloves. Switching to a non-powdered glove should eliminate most of these problems. If irritation or rashes appear, try another type of glove.
Glove Compatibility Charts:
- Microflex Chemical Resistance Guide
- VWR Safety Glove Selection Guide
- Best Glove Chemrest Chemical Guide
- Saf-T-Guard Nitrile Gloves — Chemical Performance Data
- SpecWare Chemical Application & Recommendation Guide
- Mapa Professional Chemical Resistance Guide
- Super Glove
- MCR Safety Training Permeation Guide
Other Resources:
- NIOSH Safety & Health Topic Page: Occupational Latex Allergies
- NIOSH Publication: Latex Allergy: A Prevention Guide
- “Selecting Chemical Resistant Lab Gloves”, Lab Safety Review, January, 2000
- “Pros and Cons of Lab Glove Materials”, Lab Safety Review, January, 2000
Hazard Assessments for Personal Protective Equipment
A critical first step in developing a comprehensive safety and health program is to identify physical and health hazards in the workplace. This process is known as a “hazard assessment.” Potential hazards may be physical or health-related and a comprehensive hazard assessment should identify hazards in both categories.
The hazard assessment involves obtaining information on the types of hazards present, the toxicity of the materials involved, and what other options are available to control exposure. General information about chemicals may be found in Material Safety Data Sheets. The chronic and acute effect of chemicals, biological and radiological materials should also be assessed.
Examples of physical hazards include moving objects, fluctuating temperatures, high intensity lighting, rolling or pinching objects, electrical connections and sharp edges.
Examples of health hazards include overexposure to harmful dusts, chemicals or radiation.
Serious consideration should be given to reducing these hazards by the use of engineering controls and/or administrative controls. Personal protective equipment should be used in conjunction with engineering and administrative controls.
The hazard assessment should begin with a walk-through survey of the facility to develop a list of potential hazards in the following basic hazard categories:
- Impact: (Examples: Working with or around powered tools or machinery. Use of powered liquid sprayers, air hammers, compressed air, or working in areas with high air turbulence where particles, fragments or chips are present. Working in areas where overhead hazards, falling hazards or moving hazards are present.)
- Penetration: (Examples: Working with or around powered tools or equipment. Working with glass, wire, metal, sharp objects or other materials that can cut or pierce when broken or fragmented.)
- Compression — Pinching/Crushing/Roll-Over: (Examples: Working with or around moving equipment, or parts. Exposure to falling objects. Use of heavy equipment or tools that could cause compression injuries, etc.)
- Chemical: This is a broad category which may include chemicals ranging from slightly irritating (such as cleaning products) to highly corrosive or toxic substances used in laboratories or industrial settings. Working with carcinogens, mutagens or teratogens.
- Thermal — Heat/Cold: (Examples: Operating furnaces, pouring and casting hot metal, welding. Working on steam, refrigerant, high temperature systems, etc. Working with cryogenic materials. Working in temperature extremes (e.g., steam tunnels, freezers, extended work outdoors in winter, etc.)
- Harmful Dust (Examples: asbestos, fiberglass, silica, animal dander. Woodworking, buffing, and general dusty conditions. High levels of airborne contaminants that cannot be eliminated by engineering controls.)
- Light (Optical) Radiation: (Examples: Electric arc or gas welding, cutting, or torch brazing or soldering. Working with or around lasers. Working around sources of UV radiation.
- Biologic: (Examples: Working with human pathogens or materials that may be contaminated with infectious human pathogens.)
Each of the basic hazards should be reviewed and a determination made as to the type, level of risk, and seriousness of potential injury. Consideration should be given to the possibility of exposure to several hazards at once.
The workplace should be periodically reassessed for any changes in conditions, equipment or operating procedures that could affect occupational hazards. This periodic reassessment should also include a review of injury and illness records to spot any trends or areas of concern and taking appropriate corrective action.
The suitability of existing PPE, including an evaluation of its condition and age, should be included in the reassessment.
A copy of the completed Hazard Assessment Survey and Anaylsis should be sent to US&A for review. If you need assistance in conducting your hazard assessment, please contact US&A at x5808.
Other Resources:
Protective Footwear
Determining if Foot Protection is Necessary or Required

The initial step for assessing the need of personal protective equipment (PPE) is a hazard assessment. The assessment is an important element of a PPE program because it produces the information needed to select the appropriate PPE for any hazards present or likely to be present at particular workplaces.
For example, protective footwear must be worn when there is the hazard of:
- Falling or rolling objects
- Punctures
- Stubbing or banging
- Chemical or corrosive contact
- Electrical shock
- Burns
- Slips and falls
What’s Involved in Performing a Hazard Assessment?
Since this is a performance-oriented standard, employers must act in a reasonably prudent manner in determining when and how employees, who are exposed to foot injury hazards, are to be protected. In one recent decision, a Federal Appellate Court held that one employer who required its employees to wear sturdy work shoes and made steel-toed footwear available to these employees at a discount, was acting reasonably. A policy requiring steel-toed shoes was found not necessary despite the presence of some foot hazards. OSHA believes that what is reasonably prudent with regard to foot protection may depend on:
- the frequency of the employees’ exposure to foot injury,
- the employer’s accident experience,
- the severity of any potential injury that could occur, and
- the customary practice in the industry.
Determining Type of Footwear
Select protective footwear based on the hazard assessment. For example:
- Steel-toed shoes to resist impact
- Metatarsal guards to resist impact above the toes
- Reinforced flexible metal soles or inner shoes to protect against punctures (assuming there’s no risk of electrical contact)
- Sandals and open-toed shoes are prohibited in laboratories (including art studios), and food service areas (for safety and hygienic reasons)
- For falling objects, use footwear with steel toes.
- Use metatarsal guards if there is the hazard to the metatarsal region above the toes.
- Wear chemical resistant footwear (e.g., rubber, neoprene) in areas with potential chemical or corrosive splashes. Check the SDS to match footwear with individual chemicals.
- Replace worn footwear.
Even if protective footwear is not deemed necessary, employees should still wear sturdy shoes with nonskid soles. Sandals, sneakers or dress shoes may not be appropriate for many physical activities.
Frequently Asked Questions Regarding Protective Footwear:
- Is there a specific OSHA law in regard to foot protection? Actually several OSHA standards establish rules and guidance. OSHA’s Occupational Foot Protection Standard, 29 CFR 1910.136, requires that employees wear protective footwear when exposed to dangers from falling objects, objects piercing the sole, or electrical hazards. The OSHA Personal Protective Equipment (PPE) Standard also requires that supervisors conduct a hazard assessment, develop a written plan, enforce policies, and train employees in foot protection concepts.
- What are the performance standards for protective footwear? As a minimum standard of protection, all safety footwear must meet the general requirements for impact and compression resistance, as required by ASTM F2413 (or ANSI Z41, Class 75, for footwear purchased prior to March 2005).
- What if an employee shows up at work and has forgotten his/her protective footwear? The employer is not obligated to provide employment if the employee fails to act in a reasonable and safe manner. So, if the employee is not prepared for work (i.e., lacking proper footwear), they do not need to be given work. In fact, assigning a task which requires foot protection when a worker doesn’t have the right shoes would be considered negligent.
- I’ve been told by my supervisor I must wear protective footwear because of my job. Can I be disciplined for not wearing it? Yes.
- Is the wearing of foot protection the employer’s or employee’s responsibility? Technically, the burden is the employer’s responsibility. For example, the employer is responsible for conducting the hazard assessment, the selection of PPE, determining the limitations of PPE, training, and ensuring the employee does what is required (i.e., enforcement). However, the employee must also assume responsibility to act in safe and healthful manner.
- Is employee training required for occupational foot protection? Yes. Once it has been determined that PPE is required, employees must be trained in the proper use and limitations of the equipment. For example:
- When PPE is necessary
- What PPE to use for particular hazards
- Limitations of PPE
- How to put on, adjust, wear, and remove PPE properly
- Care and maintenance of PPE.
- Who pays for the foot protection?The employer is not required to provide PPE of a personal nature (e.g., uniforms, work gloves, footwear, etc.), for the employee. However, the employer is required to ensure that protective footwear is worn if the hazard assessment determined that such PPE is necessary. The employer may specify the type of PPE to be worn or, for that matter, prohibit what should not be worn (e.g., no bare feet, sandals, open toed shoes).
The employer (UWM) does need to provide specialized PPE, such as welding helmets and chaps, respirators, hearing protection, etc. The test is whether the PPE would normally be worn outside of the workplace as well as in the workplace. If yes, the worker may be required to buy, or the employer may supply. If no, the employer must supply the necessary PPE. - Is foot protection (e.g., steel-toed shoes) required for employees working, for example, on loading docks?There isn’t a simple “yes” or “no” response. A reasonable answer would probably be: “It depends on the circumstances and the likely hazards.”
- I’ve heard that steel-toed shoes may actually increase the extent of injury should a heavy object crush the shoe. Is this correct? Steel-toed shoes are very effective in preventing injury to the toes as is so common in the workplace. All PPE, including protective footwear, has limitations. Severe injury hazards as you described should be eliminated using engineering controls, not by the mere use of PPE.
- Have we had any foot injuries at UWM due to lack of protective footwear? Yes. In one instance, a research assistant had two toes amputated when an I-beam fell from its support. The beam was only one foot off of the floor. Protective footwear would have prevented this injury. Regardless, this hazard should have been identified and eliminated by “engineering” a better support for the beam.
- What kind of shoe should electricians wear? Shoes with non-conductive soles meeting the requirements of ANSI Z41 PT9l (M/F) I-75 C-75 EH. “EH” represents the “electrical hazard” designation.
- What kind of shoe protects against punctures? At a minimum, a sturdy work shoe must be worn where injury from puncture is likely. Boots with steel insole: ANSI Z41 P91 (M/F) I-75 C-75 PR “PR” is the “puncture resistant” designation.
- What kind of shoe should be worn to prevent static buildup? ANSI Z41 P91 (M/F) I-75, C-75 SD Type I. “SD” is the “static discharge” designation.
Safety Committees
Facilities-Auxiliaries Safety Committee
Minutes:
2021: March, April, May, June, August, October
2020: January, February (no meetings remainder of year due to COVID)
Contact safety-office@uwm.edu for meeting minutes prior to 2020.
Scaffolding
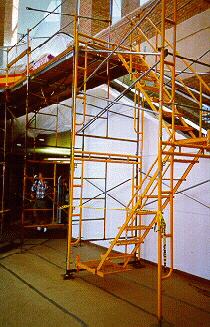
On August 30, 1996, OSHA issued revised standards for scaffolds. The revised standard, known as “Safety Standards for Scaffolds Used in the Construction Industry,” is found in Title 29 Code of Federal Regulations (CFR) Part 1926, Subpart L. The final rule updates the existing construction scaffold standards in Subpart L. The new standards set performance-based criteria to protect employees from scaffold-related hazards such as falls, failing objects, structural instability, electrocution, or overloading.
The rule also addresses training and various types of scaffolds, as well as falling object protection, ladders, weather conditions, aerial lifts, stilts, and other matters that were not previously covered by the OSHA scaffold standards. In addition, it allows employers more flexibility when using protective systems for workers on scaffolding. This rule took effect on November 29, 1996.
Listed below are some of the key provisions of the regulation:
- The standard requires fall protection at a 10 foot height above a lower level for employees. [1926.451(g)(1)]
- Guardrail Height -— The height of the toprail for scaffolds manufactured and placed in service before January 1, 2000 can be between 36 inches (0.9 m) and 45 inches (1.2 m). The height of the toprail for scaffolds manufactured and placed in service after January 1, 2000 must be between 38 inches (0.97 m) and 45 inches (1.2 m). [1926.451(g)(4)(ii)] When the crosspoint of crossbracing is used as a toprail, it must be between 38 inches (0.97 m) and 48 inches (1.3 m) above the work platform. [1926.451(g)(4)(xv)] Midrails must be installed approximately halfway between the toprail and the platform surface. [1926.451(g)(4)(iv)] When a crosspoint of crossbracing is used as a midrail, it must be between 20 inches (0.5 m) and 30 inches (0.8 m) above the work platform. [1926.451(g)(4)(xv)]
- Erecting and Dismantling -— When erecting and dismantling supported scaffolds, a competent person must determine the feasibility of providing a safe means of access and fall protection for these operations. [1926.451(e)(9) & 1926.451(g)(2)
- Training -— Employers must train each employee who works on a scaffold on the procedures to control or minimize the hazards. [1926.454]Employees must be trained in (partial list):
- Access
- Electrical hazards
- Fall protection and prevention of being struck by falling objects
- Maximum safe load of the scaffold
- Proper handling of materials on the scaffold
- Proper scaffold construction
- Proper use of the scaffold
- Site safety
- Inspections -— Before each work shift and after any occurrence that could affect the structural integrity, a competent person must inspect the scaffold and scaffold components for visible defects. [1926.451(f)(3)]
- To request an inspection, you may contact safety-office@uwm.edu or submit a work order to the Facilities Department. Please have the following information:
- Location
- Duration of work
- Type of work
- Height / Number of Bucks
- User names for training verification
- To request an inspection, you may contact safety-office@uwm.edu or submit a work order to the Facilities Department. Please have the following information:
Other Resources:
- OSHA Scaffolding E-Tool
- A Guide to Scaffold Use in the Construction Industry , OSHA 3150, Revised 2001
- Preventing Electrocutions During Work with Scaffolds Near Overhead Power Lines, NIOSH Alert, August 1991
- Preventing Worker Injuries and Deaths Caused by Falls From Suspension Scaffolds, NIOSH Alert, August 1992
Slips/Trips/Falls
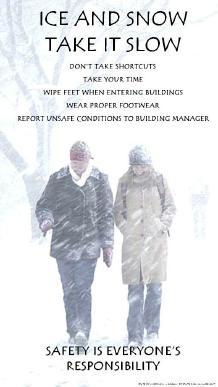
Slips, trips, and falls constitute the majority of general industry accidents. Second only to motor vehicle accidents; slips, trips and falls are the most frequent accidents leading to personal injury. Slips trips and falls can result in head injuries, back injuries, broken bones, cuts and lacerations, or sprained muscles. The Bureau of State Risk Management has identified “slips, trips and falls” as one of the top five causes of workers’ compensation claims over the last six years.
A “slip” occurs when there is too little traction or friction between the shoe and walking surface. A “trip” occurs when a person’s foot contacts an object in their way or drops to a lower level unexpectedly, causing them to be thrown off-balance. A trip most often results in a person falling forward, while a slip most often results in the person falling backward. A “fall” occurs when you are too far off-balance.
There are many situations that may cause slips, trips, and falls, such as ice, wet spots, grease, polished floors, loose flooring or carpeting, uneven walking surfaces, clutter, electrical cords, open desk drawers and filing cabinets. Loose, irregular surfaces such as gravel, shifting floor tiles, and uneven sidewalks, can make it difficult to maintain your footing. Most slip, trip and fall incidents are preventable with general precautions and safety measures.
Injuries from falls may be caused by a variety of sources. Many of these sources, like curbs, flaws in parking lots and uneven lawns, are not of significant height, but have the potential to cause significant injuries. The best way to prevent injuries such as these is to be aware of where you are going and pay attention to your walking surface.
Report even a minor fall. It could prevent someone from experiencing a more serious injury down the line.
Some of the Factors Contributing to Slips, Trips and Falls Include:
Wet or Slippery Surfaces
Wet or slippery surfaces are a major cause of slips. Highly polished floors such as marble, terrazzo, or ceramic tile can be extremely slippery even when dry and definitely increases the potential for a slip when moisture (spills, rain, snow and mud) is present. Food preparation areas and residential dorm bathrooms and kitchens are also a high risk for slippery surfaces.
The following are some simple ways to reduce the likelihood of a slip and/or fall on wet or slippery floors:
- Use anti-skid adhesive tape in high traffic areas
- Use absorbent mats in entrance ways during inclement weather. (Caution: Unanchored mats may cause slip hazards themselves. Make sure that mats lie flat and that the backing material will not slide on the floor.)
- Display wet floor signs when appropriate, note that signs are a great awareness tool but should not be the only means of control. Clean up spills and wet floors as soon as practical.
- Have a procedure to deal with spills and ensure spills are reported and cleaned up immediately.
- Use proper mats in areas that tend to be “spill prone” (bathing facilities, food preparations)
- When wet processes are used, maintain proper drainage or use platform mats
If you must walk on a slippery surface:
- Wear proper footwear for better traction on slippery surfaces
- Point your feet slightly outward, keeping your center of balance under you
- Take slow, small steps
- Use your feet as probes to detect possible slip, trip and fall hazards
- Get your feet underneath your body quickly to maintain your balance after an initial step
- Use rails or other stable objects that you can hold onto
- Protect the more vulnerable parts of you body like your head, neck and spine if you do fall
When moving from carpet to tile or dry tile to wet tile, etc. the friction (grip) between the sole of the shoe and the floor surface lessens. Alter your stride to take shorter, slower steps.
Environmental Conditions
No matter how well the snow and ice are removed from campus sidewalks, parking lots and the surrounding streets, people will invariably encounter some slippery surfaces when walking outdoors in the winter. Many cold-weather injuries are the result of falls on ice-covered streets and sidewalks. Walking on snow or ice is especially treacherous. Getting around on campus in icy conditions calls for planning, caution, and a little common sense.
- Dress warmly and wear boots with non-skid soles (avoid plastic and leather soles).
- Keep warm, but make sure you can hear what’s going on around you. Wear a bright scarf or hat or reflective gear so drivers can see you, and whatever you wear, make sure it doesn’t block your vision or make it hard for you to hear traffic.
- A heavy backpack or other load can challenge your sense of balance. Try not to carry too much–you need to leave your hands and arms free to better balance yourself.
- During the daytime, wear sunglasses to help you see better and avoid hazards. At night, wear bright clothing or reflective gear. Dark clothing will make it difficult for motorists to see you–especially if they aren’t expecting you.
- When entering a building, remove as much snow and water from your boots as possible. Take notice that floors and stairs may be wet and slippery. Walk carefully.
- Be prepared to fall and try to avoid using your arms to break your fall. If you fall backward, make a conscious effort to tuck your chin so your head doesn’t strike the ground with a full force.
- Use special care when entering and exiting vehicles–use the vehicle for support.
Streets and sidewalks that have been cleared of snow and ice should still be approached with caution. Look out for “black ice.” Dew, fog or water vapor can freeze on cold surfaces and form an extra-thin, nearly invisible layer of ice that can look like a wet spot on the pavement. It often shows up early in the morning or in areas that are shaded from the sun.
Insufficient or Inadequate Lighting
Insufficient light can make it difficult to see obstacles and notice changes in the walking surface and is associated with an increase in accidents. Move slowly where light is dim and pay increased attention to your path of travel. Moving too fast increases the likelihood you will misjudge a step or encounter a hazard before you have a chance to notice it. Moving from light to dark areas, or vice versa, can cause temporary vision problems that might be just enough to cause a person to slip on an oil spill or trip over a misplaced object.
Changes in Elevation
Changes in elevation are a major source of trip accidents. Even a change in walking surface of ¼ – ½” or greater will be sufficient to cause a trip. Curbs, cracks in the sidewalk, ramps and single steps are all examples of these hazards.
Another type of working and walking surface fall is the “step and fall.” This occurs when the front foot lands on a surface lower than expected, such as when unexpectedly stepping off a curb in the dark. A second type of step and fall occurs when one steps forward or down, and either the inside or outside of the foot lands on an object higher than the other side. The ankle turns, and one tends to fall forward and sideways. Changes in elevation may be unavoidable, but there are some simple ways to reduce accidents caused by these hazards:
- Watch for bumps, potholes, sidewalk cracks or changes in elevation
- If you identify a problem area on campus, report it to the Department of Facility Services
Climbing or Descending Stairways
Nearly half of all falls occur on stairs. Keeping stairs in good repair is essential to preventing accidents. Make sure that stairways have secure handrails and guardrails, even surfaces, even tread heights and are free of deteriorating coverings such as frayed carpet.
To prevent an accident, awareness and prevention is key. Here are some simple ways to prevent a fall incident on stairways:
- Whether going up or down stairs, always use the handrail
- Make sure stairways are well lit, with on/off switches at the top and bottom
- Make sure stairways are clear of any obstacles
- If you are wearing footwear such as high heels or sandals, use extra caution while going up and down
- If throw rugs are positioned at the top or bottom of stairways, make sure they are secured with a skid-resistant backing
- Routinely check stairs for loose or worn carpeting
- Report outdoor stairways if you notice ice, snow or water accumulation
- When carrying objects up and down steps, be sure you are able to see where you are stepping and hold onto the handrail if possible
The chance of fall accidents in stairways increases with inattention, illness, fatigue and haste. Take care when ascending and descending stairways.
Housekeeping Issues in Working and Walking Areas
Proper housekeeping in work and walking areas can contribute to safety and the prevention of falls. Not only is it important to maintain a safe working environment and walking surface, these areas must also be kept free of obstacles which can cause slips and trips. Obstacles could include clutter, obstructions across hallways and material stacked or dumped in passageways, etc.
Avoid stringing cords or lines across hallways or in any walkway. If it is necessary to do so, it should be on a temporary basis (i.e., power cords, telephone lines, etc.) and, then the item should be taped down, run overhead or a ramp should run over any cords and hoses.
Regular frequent inspections of working and walking areas should be conducted to identify environmental and equipment hazards which could cause slips, trips and falls.
- safety-office@uwm.edu
- 414-430-7506
- Engelmann 270
