Autoclave Safety 
No one should use an autoclave unless they have received recent instruction in autoclave procedure or are working under the direct supervision of an experienced autoclave worker.
Accidents are most likely to occur during the final operations of opening and unloading the autoclave, if they are to happen. When the pressure gauge reaches zero, wait one or two minutes before opening the autoclave. It is dangerous to begin opening the autoclave before the pressure gauge reaches zero. Long-sleeved, heat-resistant gloves should be worn- do not use if wet or have holes in them. Other protective equipment that should be worn to prevent being splashed by hot liquids are rubber apron and safety goggles, glasses, or faceshield.
Steam (Sterilizing) Autoclaves
The major hazards are:
- Burns resulting from physical contact with the structure of the autoclave.
- Steam burns arising from contact with steam issuing from the apparatus.
- Explosive breakage of glass vessels during opening and unloading.
- Burns arising from careless handling of vessels containing boiling liquids.
Top-Loading AutoclavesBeware of residual steam in the apparatus. Remove the lid cautiously keeping the body as far away from the apparatus as possible. Do not lean over the autoclave to examine the contents. Front-Loading Autoclaves
|
 |
Other Resources:
- Autoclave Safety Office of Radiation, Chemical & Biological Safety, Michigan State University
- Using Autoclaves Safely
 , University of California-Berkeley
 - Autoclave Safety, University of Maryland
- Autoclave / Steam Generator Installation Requirements, University of Maryland
- Autoclave Safety, Cornell University
- Autoclave Safety, University of Mississippi
- Laboratory Safety Incidents: Autoclaves, AIHA Laboratory Health & Safety Committee
- Autoclave Safety, University of Alabama at Birmingham
- Safe and Effective Use of Autoclaves, University of Pennsylvania
- Autoclaves, Iowa State University
Fume Hoods: Procedures and Practices

- General
- Equipment Use
- Good Work Practices
- Waste Disposal
- Good Housekeeping Practices
- Proper Sash Use
- Fume Hood Testing and Maintenance
General
Laboratory fume hoods serve to control exposure to toxic, offensive or flammable vapors, gases and aerosols. Fume hoods are the primary method of exposure control in the laboratory.
Use the right hood for the job:
- General Purpose Hoods:
- Standard Fume Hood
- Bypass Hood, or Constant Volume Hood
- Variable Air Volume (VAV) Hood
- Auxiliary Air Supplied Hood (Note: At UWM, found only in the Chemistry Building)
- Radioisotope Hood–These hoods have been authorized by Radiation Safety for use with volatile radioactive materials.
- Biosafety Cabinet–Specialized hoods to prevent or minimize the exposure of humans or the environment to biohazardous agents or materials.
- Perchloric Acid Hoods must be used when working with PCA (e.g., acid digestion procedures). These hoods prevent the formation of perchlorates which could lead to explosions. They are constructed with special materials and have water-wash capability.
- Hoods are labeled for special use when practical.
Equipment Use
- Place apparatus and equipment as far back as possible in hood for safety and optimal performance. Equipment should be placed a minimum of 8 inches inside the hood. Keep electrical connections outside of hood.
- Ensure that equipment or materials do not block the baffle vents in the back of the hood.
- When using a large apparatus inside the hood, place the equipment on blocks, when safe and practical, to allow air flow beneath it.
- Do not place electrical apparatus or other ignition sources inside the hood when flammable liquids or gases are present. Keep in mind that liquids with low flash points may ignite if they are near heat sources such as hot plates or steam lines.
Good Work Practices
- When using the fume hood, keep your face outside the plane of the hood sash and remain alert to changes in air flow.
- Work at least 6 inches back from the face of the hood. A stripe on the bench surface is a good reminder.
- Always use splash goggles, and wear a full faceshield if there is possibility of an explosion or eruption.
- Do not make quick motions into or out of the hood, use fans, or walk quickly by the hood opening. All will cause airflow disturbances which reduce the effectiveness of the hood. A demonstration of the effects of walking past the fumehood is demonstrated in this video clip from the EHS Department at the University of Nevada-Reno.
- Substitute less hazardous or less volatile chemicals where possible;
- Look for process changes that improve safety and reduce losses to the environment (e.g. more accurate chemical delivery systems vs. pouring volatile chemicals from bottles); and,
- Develop a process to evaluate research proposals ahead of time for potential emissions and look for opportunities to reduce them.
Waste Disposal
Do not use the hood as a waste disposal mechanism. Apparatus used in a hood should be fitted with condensers, traps, or scrubbers to contain and collect waste solvents, toxic vapors or dust. Please contact staff in UWM’s Hazardous Waste Program for additional information on waste disposal or refer to the following webpage: Hazardous Waste Disposal Information.
Good Housekeeping Practices
- Limit chemical storage in fume hoods. Keep the smallest amount of chemicals in the hood needed to conduct the procedure at hand;
- Store hazardous chemicals such as flammable liquids in an approved safety cabinet;
- Keep caps on chemical reagent bottles tight and check fitting on laboratory glassware to minimize vapor loss;
Always use good housekeeping techniques to maintain the hood at optimal performance levels. Excessive storage of materials or equipment can cause eddy currents or reverse flow resulting in contaminants escaping from the hood.
Proper Sash Use
- Do not remove sashes from sliding sash hoods. The hood should be kept closed, except when working within the hood is necessary.
- Use sliding sash for partial protection during hazardous work.
- Do not remove the sash or panels except when necessary for apparatus set-up. Replace sash or panels before operating.
- Keep the slots of the hood baffles free of obstruction by apparatus or containers. See video clip (courtesy of University of Nevada EHS Department.)
- Keep the hood sash closed as much as possible to maximize the hood’s performance. Keep the sash closed when not in use to maximize energy conservation. This video clip (courtesy of the University of Nevada) demonstrates the effects of raising and lowering the sash height.

Demonstration of fume hood capture efficiency with the sash in the full-open position. Notice escape of the visualization smoke from the bottom of the hood. |

Notice the improved capture efficiency with the sash in the partially-closed position. |
Fume Hood Testing and Maintenance
Hoods should be evaluated by the user before each use to ensure adequate face velocities and the absence of excessive turbulence.
In case of exhaust system failure while using a hood, shut off all services and accessories and lower the sash completely. Leave the area immediately.
The required face velocity is 100 feet per minute (0.5 m/sec). This velocity is capable of controlling most low-velocity cross drafts and turbulence created by normal working practices at the face of the hood. All hoods should have a sticker designating the maximum safe sash height. Keep the sash at the appropriate level to ensure optimal face velocity.
The low flow hoods in the North Tower of the Chemistry Building were evaluated at installation using the ASHRAE 110 Method of Testing Performance of Laboratory Fume Hoods. In this sophisticated test, a tracer gas (sulfur hexaflouride) is released at a known rate inside the hood. Samples are taken in the breathing zone of a mannequin standing at different positions in front of the hood. The DILHR mandated pass criteria is 100 parts per billion (ppb) tracer at the breathing zone of the mannequin. As with conventional style hoods, keep the sash at the appropriate level as indicated by the test label to ensure optimal hood performance. The objective is to minimize the sash opening to achieve proper containment.
Regular testing of the fume hood should be done by Facility Services or University Safety and Assurances staff to ensure that it is operating properly. Hoods are labeled to indicate the last inspection date. If your hood has not been tested within the past year, please contact Zack Steuerwald, x5808.
State of Wisconsin Department of Safety and Professional Services states :
| SPS 332.24
(6) VENTILATION FOR LABORATORY FUME HOODS.
|
The OSHA Laboratory Standard (29 CFR 1910.1450) does not specify safe hood operation, flows or face velocities. However, it does mandate a chemical hygiene plan and lists requirements for the plan, including “a requirement that fume hoods and other protective equipment are functioning properly and specific measures that shall be taken to ensure proper and adequate performance of such equipment.” The non-mandatory Appendix A states: “General air flow should not be turbulent and should be relatively uniform throughout the laboratory, with no high velocity or static areas; airflow into and within the hood should not be excessively turbulent (200); hood face velocity should be adequate (typically 60-100 lfm)”
Additional Resources
Ductless Fume Hood Policy
Occasionally, the Department of University Safety & Assurances is asked to approve the purchase of ductless fume hoods for use in labs. The hoods are designed to remove hazardous fumes and vapors from the work area as the exhausted air passes through an absorbent, such as activated charcoal.
The system’s appeal is largely economic because it does not require the expensive ductwork that traditional hoods need to exhaust fumes to the outside. However, in practice these hoods require constant attention and often do not provide adequate face velocity. In many cases, the filter is designed for specific chemicals and will not protect against the variety of chemicals used in a typical university laboratory.
Ductless fume hoods are plagued with the problems associated with “breakthrough” and with desorption of vapors from the absorbent. The user will also face expenses to replace charcoal filters and to dispose of the expended filters, which may be classified as hazardous waste. Estimated cost of filter disposal will be about $100 each. Therefore, depending upon the amount of use, annual maintenance costs to the owner could exceed several hundred dollars.
We do not believe that the hoods provide reliable protection against chemical exposure, and we think they may, in fact, give workers a false sense of security. Therefore, we strongly recommend against and, except in extremely rare circumstances, will not approve the use of ductless fume hoods. Moreover, we do not provide inspection or certification for ductless fume hoods.
If a department insists on purchasing a ductless fume hood, it should only be used with small amounts of low-toxicity chemicals, and the hood should be clearly labeled to indicate that it may not provide suitable protection from hazardous chemicals.
Laser Safety
Laser is an acronym for “light amplification by stimulated emission of radiation.” Radiation in this case occurs in the portions of the electromagnetic field with insufficient energy to induce ionization or breaking up on the atom (i.e., it is non-ionizing). Non-ionizing radiation occurs in the radio frequency, microwave, infrared visible and ultraviolet ranges.
Lasers operate in two modes: pulsed (e.g. Q-switched lasers) and continuous wave (CW). Generally, pulsed lasers are more hazardous than CW lasers. Lasers using C02 and certain other materials emit beams that are not visible to the eye, hence they are particularly hazardous.
Biological damage caused by lasers includes thermal burns, photochemical burns and retinal injury. Electrical safety and fire are also important concerns.
In the use of a laser, safety procedures must be established and followed so that protection is provided for students, teachers, workers, visitors, bystanders and passersby.
Hazards may include:
- Vaporized target material from high-energy laser cutting, drilling and welding operations.
- Gases from lasers
- Gases from cyrogenic coolants
- Ultraviolet infrared radiation
- Electrical hazards–cables between the power supply and laser head must be properly selected and placed and the capacitor system safeguarded.
All electrical equipment must be well-maintained to prevent shocks and burns. Energy sources for lasers are essentially high-voltage equipment. Capacitors must be de-energized before cleaning or any repairing. All voltage on capacitors must be removed before leaving equipment. Interlocks must be provided to prevent access to components of high-voltage currents. Fire buttons must be remote from the charge and hold buttons to prevent accidental discharge of a laser. All ultraviolet and infrared radition must be shielded.
Hazard controls in the operation of lasers are:
- Do not look into the primary beam or at reflections of the beam.
- Avoid aiming the laser with the eye to prevent looking along the axis because of the hazard of reflection.
- If possible, work with lasers should be done in areas of high general illumination to keep pupils constricted.
- Proper safety glasses should be worn to filter out specific injurious frequencies of the unit.
- Terminate the laser beam with material that is non-reflective and fire resistant.
- Provide adequate clear space around the laser path.
- Provide protection from electrical shock from the potentially dangerous electrical sources of high and low voltage.
- High-voltage rectifiers may generate Xrays and require protection.
There are many special precautions that must be taken from the particular lasers as high-powered pulsing lasers and low-powered gas and semiconducted systems. Carbon dioxide and nitrogen lasers are fire hazards.

Any room where a laser is located must be adequately marked on the entering door and in the room so that everyone (students, faculty, staff, and/or visitors) is aware of its presence.
Security of the equipment against inadvertent intrusion must always be considered when operating a laser.
At least two people should be present at all times when lasers are in operation. Under no circumstances should a room containing an active laser be left unattended or unlocked.
Ventilation of the room must be considered to remove any accumulation of hazardous gases or fumes that are generated in the operation of the laser.
All personnel in the laser area should be informed about the potential eye hazard of accidental exposure to the beam. It is the responsibility of the project supervisor to give each person concerned a copy of these rules and ensure that all safety precautions are observed.
More detailed information is given in the American National Standard for the safe use of lasers (ANSI Z136.1-1973) and OSHA 29 CFR 1910.32 for eye protection; 21 CFR 1040 (U.S. Food and Drug Administration’s control of commercial devices); and OSHA’s 29 CFR 1926.54 construction uses. These standards cover facilities, program requirements and safety measures. It is strongly recommended these standards be reviewed as supplementary information to be followed.
UWM Resources:

Other Resources:
- Laser Hazards, OSHA Safety and Health Topics
- Laser Hazards, OSHA Technical Manual
- Laser Safety Information Bulletin, Laser Institute of America, (Covers concerns and issues related to laser safety for the new laser user.)
Laser Safety Manual
Manual in .pdf format for printing purposes.
General Information
Laser is an acronym for light amplification by stimulated emission of radiation. Radiation in this case occurs in the portions of the electromagnetic field with insufficient energy to induce ionization or breakup of the atom (i.e., it is non-ionizing). Non-ionizing radiation occurs in the radio frequency, microwave, infrared visible and ultraviolet ranges. The radiation emitted by lasers is unique. It is monochromatic — made up of one or very few wavelengths — depending on the materials used to emit the beam. It is coherent, meaning it is a tight narrow bundle of waves, doesn’t spread out, and can be finely focused. Finally lasers are very bright because they contain an intense amount of radiant energy. Lasers operate in two modes: pulsed (e.g., Qswitched lasers) and continuous wave (CW). Generally, pulsed lasers are more hazardous than CW lasers. Lasers using CO2 and certain other materials emit beams that are not visible to the eye; hence, they are particularly hazardous.
Biological damage caused by lasers includes thermal burns, photochemical injuries, and retinal injury. Electrical safety and fire are also important concerns. Standards governing lasers are ANSI Z136.1 and OSHA 29 CFR 1910.32 for eye protection; 21 CFR 1040 (the U.S. Food and Drug Administration’s control of commercial devices); and OSHA’s 29 CFR 1926.54 (construction uses). These standards cover facilities, program requirements and safety measures.
Laser Hazard Classification
The basic approach of virtually all laser safety standards has been to classify lasers by their hazard potential, which is based upon their optical emission. The next step is to specify control measures which are commensurate with the relative hazard classification. In other words, the laser is classified based upon the hazard it presents, and for each classification a standard set of control measures applies. In this manner, unnecessary restrictions are not placed on the use of many lasers which are engineered to assure safety.
This philosophy has given rise to a number of specific classification schemes such as the one employed in the American National Standards Institute’s (ANSI) Z136.1 Safe Use of Lasers (1993) standard. The ANSI scheme has four hazard classifications. The classification is based upon the beam output power or energy from the laser (emission) if it is used by itself. If the laser is a component within a laser system where the raw beam does not leave the enclosure, but instead a modified beam is emitted, the modified beam is normally used for classification.
Basically, the classification scheme is used to describe the capability of the laser or laser system to produce injury to personnel. The higher the classification number, the greater the potential hazard. Brief descriptions of each class are as follows:
Class 1 – Exempt Laser, No Hazard
Class 1 lasers or laser systems are those that do not under normal operating conditions pose a hazard. Class 1 lasers are termed “no risk” lasers because they are not capable of emitting hazardous laser radiation levels under any operating or viewing conditions. The exemption from hazard controls strictly applies to the emitted laser radiation hazards and not to other potential hazards. Most lasers by themselves do not fall into the Class 1 category, but when the laser is incorporated into a consumer good or office machine the resulting system may be Class 1.
Class 2 and 2a – Low Power, Low Risk
Class 2 and 2a lasers have low power and emit visible light. They will cause harm if viewed for longer than 1000 seconds or if they have enough power will cause pain when viewed for longer than 0.25 seconds (the eye aversion response time). Class 2 lasers, often termed “low power” or “low risk” laser systems, are visible lasers which are only hazardous if the viewer overcomes his or her natural aversion response to bright light and continuously stares into the source. While such an event is remote, it could just as readily occur as blinding oneself by forcing oneself to stare at the sun for more than 10 to 20 seconds.
Precautions are required to prevent continuous staring into the direct beam. Momentary (less than 0.25 second) exposure occurring in an unintentional viewing situation is not considered hazardous.
Examples of Class 2 lasers are code readers in food stores, laser tag guns, and positioning lasers in medical applications. This class is further redefined dependent on whether the laser is continuous (CW) or pulsed:
- Visible (400 nm to 700 nm) Continuous Wave (CW) laser devices that can emit a power exceeding the limit for Class 1 for the maximum possible duration inherent to the design of the laser or laser system, but not exceeding 1 mW.
- Visible (400 nm to 700 nm) repetitively pulsed laser devices that can emit a power exceeding the appropriate limit for Class 1 for the maximum possible duration inherent to the design of the laser device but not exceeding the limit for the 0.25 second exposure. Additionally, there is a Class 2a laser further defined as a visible (400 nm to 700 nm) laser or laser system that is not indented for intra-beam viewing and does not exceed the exposure limit for 1000 seconds of viewing time.
Class 3a and 3b Lasers – Moderate Power, Moderate Risk
Class 3a lasers or laser systems would not normally injure the eye if viewed for only momentary periods (within the aversion response of 0.25 seconds) with the unaided eye, but may present a greater hazard if viewed using collecting optics. Those lasers are labeled with a CAUTION label.
Another group of Class 3a lasers have DANGER labels and are capable of exceeding permissible exposure levels for the eye in 0.25 seconds and still pose a low risk of injury.
Class 3b lasers or laser systems are those that can produce a hazard if viewed directly. This includes intra-beam viewing of specular reflections. Normally, Class 3b lasers will not produce a hazardous diffuse reflection. Class 3b is broken into four different frequency and energy regions:
- Infrared (1.4 µm to 1000 µm) and ultraviolet (200 nm to 400 nm) laser devices. Emits radiant power in excess of the Class 1 limit for the maximum possible duration inherent to the design of the laser device. Cannot emit an average radiant power of 0.5 W or greater for viewing times greater than 0.25 seconds, or a radiant exposure of 10 J/cm2 within an exposure time of 0.25 seconds or less.
- Visible (400 nm to 700 nm) CW or repetitive pulsed laser devices. Produce a radiant power in excess of the Class 1 assessable exposure limit for a 0.25 second exposure (1 nW for a CW laser). Cannot emit an average radiant power of 0.5 W or greater for viewing time limits greater than 0.25 seconds.
- Visible and near-infrared (400 nm to 1400 nm) pulsed laser devices. Emit a radiant energy in excess of the Class 1 limit but cannot emit a radiant exposure that exceeds that required to produce a hazardous diffuse reflection.
- Near-infrared (700 nm to 1400 nm) CW devices or repetitively pulsed laser devices. Emit power in excess of the exposure limit the Class 1 for the maximum duration inherent in the design of the laser device. Cannot emit an average power of 0.5 W or greater for periods in excess of 0.25 seconds.
Class 4 – High Power, High Risk
Class 4, “high power” laser systems normally have average outputs of greater then 500 milliwatts, present a “high risk” of injury and can cause combustion of flammable materials. This class includes pulsed visible and near IR lasers capable of producing hazardous diffuse reflections, fire, and skin hazards. Also, systems whose diffuse reflections may be eye hazards and direct exposure may cause serious skin burns. Class 4 lasers normally require restrictive warning labels and even more restrictive control measures (e.g., safety goggles, interlocks, warning signs, etc). Class 4 lasers are further divided into two sub-classes based on frequency (i.e., wavelength):
- Ultraviolet (200 nm to 400 nm) and infrared (1.4 µm to 1000 µm) laser devices. Emit an average power of 0.5 W or greater for periods greater then 0.25 seconds, or a radiant exposure of 10 J/cm2 within an exposure duration of 0.25 seconds or less.
- Visible (400 nm to 700 nm) and near-infrared (700 nm to 1400 nm) laser devices. Emit an average power of 0.5 W or greater for periods greater than 0.25 seconds, or a radiant exposure in excess of that required to produce a hazardous diffuse reflection.
Laboratory Controls
Although accidents occur, laser systems are designed to be safe. The objective of a safe design is to ensure that the equipment controls, interlocks, beam enclosures, shutters, and filters are appropriate to the hazard potential of the system and to the experience level of the personnel operating and servicing the equipment. The goal of restricting human access to hazardous levels of optical radiation or live electrical currents, is usually achieved by permanent interlocks which are designed to be fail-safe or failure-proof. For example, extensive use is made of mechanical electrical interlocks. In this instance, the lateral or rotary movement of a hinge or a latch activates a switch which is in the power circuit for the laser. The design of interlock ensures that even partial opening of the panel to a point where hazardous radiation can be emitted from the opening results in shutdown. Additionally, positive-activated switches (e.g., “dead-man” type) are often used to ensure operator alertness and reduce the risk of accidental firing.
For certain applications laser projections are used. In such instances, it is often desirable to alter the output beam pattern of a hazardous laser so a relatively safe pattern results. Methods to accomplish this include the use of wide beams, unfocused beams or beam diffusers. A CW laser with an emergent beam diameter of 10 – 20 cm is less hazardous than a laser of the same power with a 2 nm beam diameter. An unfocused beam is safer because the biological effect depends upon the total power and the beam irradiance. A diffuser is used to spread the beam over a greater area and thus change the output from intra-beam viewing to an extended source.
Generally, the actual classification of the laser would not change unless the output beam diameter were greater than 80 mm. In theory, a diffuser could change a Class 4 laser into a Class 1 or 2 laser; however, in practice, diffusers are usually effective in reducing the hazard classification approximately one class. The safety applied to indoor laser installations usually depends on the class of the laser.
Class 1 (exempt) laser systems do not require much control. The user may opt to post the area with a Low Power Laser sign. The laser should be labeled with the beam characteristics. Some Class 3b or Class 4 laser systems are embedded in closed devices and the device is then classified as a Class 1 system. For such systems, the manufacturer normally installs enclosure interlocks and service panels to prevent tampering.
Additionally, persons using the system must receive training on the hazards and controls for that laser before being designated and “authorized” operator.
Class 2 (low power) lasers require a few more controls. This is the first instance when, in some applications, posting the area with a CAUTION sign becomes mandatory.
Additionally, non-reflective tools are often used to reduce reflected light. Controls applied to the system include blocking the beam at the end of its useful path, controlling spectator access to the beam, and controlling the use of view ports and collecting optics.
Class 3a lasers are the most common laser system used and are potentially hazardous when using optics. Thus, posting of the area with either CAUTION or DANGER signs depends upon the irradiance. Personnel maintaining such systems or conducting research with unenclosed beams should be given a baseline eye exam. Control measures are concentrated on eliminating the possibility of intra-beam viewing by:
- Establishing alignment procedures that do not include eye exposure
- Use proper safety eyewear if there is a chance that the beam or a hazardous specular reflection will expose the eyes
- Control of fiber optic emissions
- Establishment a normal hazard zone for outdoor use
Class 3b laser systems are potentially hazardous if the direct or specularly-reflected beam is viewed by the unprotected eye, consequently eye protection may be required if accidental intra-beam viewing is possible. It is at this point that many of the suggested controls become mandatory. Besides posting the area with DANGER signs, other control measures include:
- Permitting only experienced personnel to operate the laser and not leaving an operable laser unattended if there is a chance an unauthorized user may attempt to operate the laser
- Baseline eye exam required for maintenance and research applications
- Control of spectators
- Laser power controlled by a key-operated master switch
- Mounting the laser on a firm support to assure that the beam travels along the intended path
- Assuring that individuals do not look directly into a laser beam with optical instruments unless an adequate protective filter is present within the optical train
- Eliminating unnecessary specular (mirror-like) surfaces from the vicinity of the laser beam path, or avoid aiming at such surfaces
Class 4 laser systems that are pulsed visible and IR-A lasers are hazardous to the eye from direct beam viewing, and from specular (and sometimes diffuse) reflections. Ultraviolet, infrared, and CW visible lasers present a potential fire and skin hazard. These “high power” lasers present the most serious of all laser hazards. Besides presenting seriouseye and skin hazards, these lasers can often ignite flammable targets, create airborne contaminants, and usually have a potentially lethal, high-current/high voltage power supply. The following rules should be carefully followed for all high power lasers:
- Enclose the entire laser beam path if at all possible. If done correctly, the laser’s status could revert to a less hazardous laser classification.
- Safety interlocks at the entrance of the laser facility shall be constructed so that unauthorized personnel are not allowed access to the area while the laser is capable of emitting laser radiation at Class 4 levels.
- Ensure that all personnel wear adequate eye protection, and if the laser beam irradiance represents a serious skin or fire hazard that a suitable shield is present between the laser beam(s) and personnel.
- Laser electronic firing system for pulsed lasers shall be designed so that accidental pulsing of a stored charge is avoided. Additionally, the firing circuit shall incorporate a fail-safe (e.g., dead man) system.
- Good ambient illumination is essential when eye protection is being worn. Light colored, diffuse surfaces assist in achieving this goal.
- Using remote firing and video monitoring or remote viewing through a laser safety shield where feasible.
- Because the principal hazard associated with high-power CW far-infrared (e.g. CO2) lasers is fire, a sufficient thickness of earth, firebrick, or other fire-resistant materials should be provided as a backstop for the beam.
- Reflections of far-infrared laser beams should be attenuated by enclosure of the beam and target area or by eyewear constructed of a material which is opaque to laser wavelengths greater than 3 µm (e.g., plexiglass). Remember, even dull metal surfaces may be highly specular in far-infrared laser wavelengths.
A laser operational safety procedure manual is a document used to describe both a system’s potential hazards and controls implemented to reduce the risk of injury from the laser. It may detail specific administrative controls such as signs or lights, engineering controls such as interlocks, enclosures, grounding, and ventilation, required personal protection such as eyewear or clothing, and training with regard to laser safety or chemical safety. As a minimum, an operational safety procedure must be promulgated for:
- Class 4 laser systems
- Two or more Class 3 lasers with different operators and no barriers
- Complex or non-conforming interlock systems or warning devices
- Modifications of commercial lasers which have decreased safety
- Class 2, 3, or 4 laser systems used outdoors or off site
- Beams of Class 2, 3, or 4 lasers which must be viewed directly or with collecting optics near beam.
Warning signs and labels are used to alert workers. Placarding of potentially hazardous areas should be accomplished for Class 3b and Class 4 lasers. Appropriate warning labels shall be affixed permanently to all Class 2, 3, and 4 lasers and laser systems. Class 2 and 3a usually use CAUTION signs/labels while Class 3b and 4 use DANGER signs/labels. Examples of such warning signs are seen below.
Laser Warning Signs


Control of Associated Hazards
The wide variety of equipment used in conjunction with lasers often have associated safety problems.
Noise
The primary source of noise around laser activities is from capacitor bank discharges. This noise hazard originates from electrical components such as high capacitance condensers producing impulse noises which exceed 140 dBA (the exposure limit for impulse noises). Hearing protection should be required for all individuals who may be exposed to these very high noise levels.
X-Radiation
Whenever potentials in excess of 15 kV exist in a vacuum, the production and propagation of Xradiation outside the containment must be considered possible. Most laser systems use voltages less than 8 kV, and typically the higher voltages are on low current devices such as Q-switches.
However, some research models are now operating at voltages in the neighborhood above 20 kV. If there is any doubt in your mind as the existence of an X-radiation hazard associated with your operation, contact the campus radiation safety office.
Fire Protection
Some fire-fighting equipment should be provided; however the purpose of such equipment should be understood. It is to be used to extinguish or control small fires only. If a fire starts contact the campus police at 9-911 as soon as possible and notify other to leave the area immediately.
Electrical Hazards
To date, more than a dozen electrocutions of individuals from laser-related accidents have been reported in the United States. In 1986, a graduate student working with a CO2 laser was wiping condensate from the laser tube when he received a 17 kV electrical shock. He suffered cardiac arrest and 2nd degree burns. In 1988, a laser repair technician was fatally electrocuted while working alone on a CO2 laser. He reportedly defeated the interlock system. A senior research scientist, working alone, was electrocuted while trying to replace a high-voltage regulator tube in a laser power supply. These accidents could all have been prevented.
General guidelines:
- Use the buddy system, especially after normal working hours or in isolated areas.
- Do not engage in any hazardous activities when fatigued or under medication (except under physician’s approval).
- Do not engage in any hazardous activity when your mental attitude, whether through emotional or chemical stimulus, would incline you toward risk taking.
Specific guidelines to prevent electrical shock:
- Avoid wearing rings, metallic watchbands and other metallic objects.
- When possible, use only one hand in working on a circuit or control device.
- Never handle electrical equipment when hands, feet or body are wet, perspiring, or when standing on a wet floor.
- With high voltages, regard all floors as conductive and grounded unless covered with a well-maintained, dry rubber matting of a type suitable for electrical work.
- Learn rescue procedures for helping victims of apparent electrocution: Kill the circuit; remove the victim with a non-conductor if still in contact with an energized circuit; initiate mouth-to-mouth respiration immediately and continue until relieved by emergency medical staff; have someone call for emergency aid.
Airborne Contaminants
Laser-Generated Air Contaminants (LGAC) may be produced when certain Class 3b and Class 4 beams interact with matter. While it is difficult to predict what LGAC may be released in any given situation, it is known that contaminants, including new compounds, can be produced with many types of lasers. When the target irradiance reaches a given threshold, approximately 107 Wcm-2, target materials may liberate toxic and noxious airborne contaminants. Special optical materials used for far infrared windows and lenses have been the source of potentially hazardous levels of airborne contaminants.
This material is provided as an overview of basic laser safety issues. If you would like additional information regarding lasers or the use of lasers in your lab please contact the Radiation Safety Program Office at 229-4275.
References:
- Laser Institute of America, Laser Safety Guide, 9th ed., Laser Institute of America, Orlando, FL, 1993.
- Sliney, D., and Wolbarsht, M., Safety With Lasers and Other Optical Sources: A Comprehensive Handbook, Plenum Press, New York, NY, 1980.
- University of Wisconsin – Madison, Radiation Safety for Radiation Workers Handbook, 1998.
LASER Standard Operating Procedure
LASER Standard Operating Procedure (fill-able Word document format)
Alignment Procedures for Class 3b and Class 4 Lasers

- Exclude unnecessary personnel from the laser area during alignment.
- Whenever possible, use low-power visible lasers for path simulation of higher-power visible or invisible laser.
- Wear laser protective eyewear during alignment. Use special alignment eyewear when circumstances (e.g. wavelength, power, etc.) permit their use.
- When aligning invisible (e.g. UV, IR) beams, use beam display devices such as image converter viewers or phospor cards to locate beams.
- Perform alignment tasks using high-power lasers at the lowest power level.
- Use a shutter or beam block to block high-power beams at their source except when actually needed during the alignment process.
- Use a laser-rated beam block to terminate high-power beams downstream of the optics being aligned.
- Use beam blocks or laser protective barriers in conditions where alignment beams could stray into areas with uninvolved personnel.
- Place beam blocks behind optics (e.g.: turning mirrors) to terminate beams that might miss mirrors during alignment.
- Locate and block all stray reflections before proceeding to the next optical component or section.
- Be sure all beams and reflections are properly terminated before high-power operation.
- Post appropriate area warning signs during alignment procedures where laser are normally Class 1 (enclosed).
- Alignments should be done only by those individuals who have received laser safety training.
Eyewash and Safety Shower Information

The American National Standards Institute (ANSI) has established a voluntary standard covering emergency eye wash and shower equipment. This standard ANSI Z358.1 “Emergency Eye Wash and Shower Equipment” is intended to serve as a guideline for the proper design, performance, installation, use and maintenance of emergency equipment. ANSI Z358.1 was originally adopted in 1981 and been periodically revised. Some of the provision of the ANSI Z358.1-1998 standard regarding laboratory eye-washes include:

- The area surrounding the eyewash (3 ft) must be kept clear for easy access during an emergency.
- The valve actuator must be large enough to be easily located and operated by the user.
- The “hands-free” stay-open valve must activate in one second or less.
- The eyewash should be located within 10 seconds of the hazard and the path of the eyewash must be unobstructed.
- The eyewash should be identified with a highly visible sign and the area around the eyewash should be well-lighted.
- The eyewash unit must be capable of delivering 0.4 gallons (1.5 liters) of water per minute for 15 minutes.
- All employees who might be exposed to a chemical splash need to be trained in the use of the equipment.
- The water delivered by the eyewash should be tepid.
- The eyewash should be connected to an uninterruptible water supply with at least 30 PSI flow pressure.
- Plumbed emergency equipment shall be activated weekly to verify proper operation and should be inspected annually.

It is recommended that records be kept of all inspections and maintenance and that the equipment be inspected and maintained in accordance with ANSI Z358.1-1998 and the manufacturer’s recommendations.
Faucet-mounted Emergency Eyewash Units
Many laboratories can use additional eyewash facilities. Eyewash provisions are required wherever corrosive materials or other chemicals “injurious to the eyes” are used (Source: ILHR 32).
If you are considering the installation of an eyewash unit consider the following advantages and disadvantages of the faucet-mounted models (available through most scientific supply and safety supply catalogs). These models are recommended in areas already served by a conventional eyewash installation, but where additional eyewash capabilities are desired.

Advantages
- They are relatively inexpensive ($50-$70 to buy, $0-100 to install, depending on whether you need installation help) versus traditional plumbed-in eyewash installations.
- They are simple to use.
- They are easy to find (we are often surprised that people don’t know where the nearest eyewash is located. However, most lab personnel have no trouble identifying the nearest faucet).
- You have the ability to temper the water (we have tried to “practice” washing our eyes out as recommended for 15 minutes in cold water. Our most machismo soldier-of-fortune type lasted the longest, 60 seconds.) When someone actually has something in their eye, they are probably more motivated to wash their eyes out longer, or they may be more sensitive to the extreme temperature. A training film available from our department (provided by the U.S. Geological Survey) shows how to assist someone washing their eyes out by helping them hold their head in the water flow to overcome the natural tendency to pull away from the cold water.
- You have the ability to flush the system. We recommend that all eyewash systems (fixed and portable) be flushed for three minutes each week to eliminate dangerous bacterial and amoebic growth. We have noted that many eyewashes do not get flushed routinely (NOTE: This is a LAB responsibility! While Facility Services provides routine quarterly to semi-annual testing of emergency showers and eyewashes it is up to each lab to flush their eyewashes for hygiene purposes.) Faucet-mounted eyewashes get flushed out every time someone uses the faucet. Also, they are easier to flush out, because a drain is usually present.
Disadvantages
- Some faucets do not have enough water pressure to provide an adequate stream height out of a faucet mounted eyewash.
- Training of all faucet users is necessary. You don’t want someone to frantically turn on the eyewash and start flushing their eyes after someone else has just used the faucet for hot water. We advise those with faucet eyewashes to flush hot water out with a little cold water after each use.
- Compatibility. Only a few faucet-mount eyewashes are available. Not all faucets will accept these mounts.
- Distance between eyewash spouts. For the least expensive faucet-mount models available, the two water spouts are too close together. Washing both eyes at the same time with these models is difficult, if not impossible.
Summary
Consider the above advantages and disadvantages in installing a faucet eyewash. Overall, review your laboratory operations and determine if additional eyewash protection is warranted. The faucet mounted eyewash will serve well, especially if there is a permanent, plumbed-in unit in the corridor that you can move to once the immediate need for washing a chemical out of your eye is satisfied.
If you would like further information or would care to discuss the use of faucet-mounted eyewashes, e-mail questions to Zack Steuerwald, Lab Safety Program Manager, at x5808.
Vacuum Systems

Many laboratories at UWM require the use of vacuum systems. Several buildings have centralized vacuum systems for laboratories (e.g., Chemistry, Lapham, Enderis). Laboratories may also use other dedicated vacuum equipment. Vacuum may be used for:
- evacuating glass vessels, Dewar flasks, desiccators, cold traps and other chambers
- separation procedures involving distillation and extraction
Your building’s central vacuum system is not intended and must not be used to eliminate chemical wastes. Using the system for chemical waste disposal is in violation of good environmental stewardship and applicable regulations. Improper use of the system will result in reduced service life of the system and increased maintenance costs for your department.
Prior to set up and operation, you need to perform a risk assessment regarding potential hazards.
Vacuum work can result in an implosion, creating the hazard of flying glass and spilled chemicals. Systems at reduced pressure, which are subject to rapid pressure changes, may result in the possibility of liquids being pushed into unwanted locations.
Water-sealed or carbon rotary vane pumps can generate significant heat and friction. Therefore, when pulling a vacuum on a system that generates flammable vapors, care must be taken to ensure hazardous concentrations are not generated in the system.
Please consult with your instructor, supervisor or safety committee for additional safe lab practices involving vacuum systems. Please be sure to document these procedures in your chemical hygiene plan. You need to consider:
- How will you prevent liquids and corrosive gases from being drawn into other laboratory components or the building’s central vacuum system? Traps (Kjeldahl) and condensers should be used to insure these chemicals do not enter the vacuum system.
- Whether relief valves are necesssary for your vacuum work?
- What methods are necessary to protect vacuum pumps?
- What maintenance schedules are necessary, including changing the vacuum pump oil? Pump oil needs to be disposed as a chemical waste.
- How to properly vent the vacuum pump exhaust in a safe and environmentally acceptable way? In most cases, vacuum procedures shall be performed in a fume hood.
Other laboratory safety considerations involving vacuum systems may include:
- What glassware is suitable for vacuum work, and how do you inspect this glassware?
- What methods will you use to protect from implosion? Vessels and other glassware shall be wrapped to reduce fragmentation upon implosion.
- What methods and safe work practices will you use to perform distillations that involve flammable or toxic materials?
- How will you instruct and monitor your lab personnel on safe and proper procedures for work involving vacuum systems?
Gas Cylinder Safety
|
|

Background Information
This document contains basic guidelines and rules to help ensure the safe handling and storage of compressed gas cylinders. Compressed gases are used in a variety of UWM programs such as instructional and research laboratories, health sciences, fine arts, scientific diving, and welding. Compressed gases serve the university in many ways, but gases under high pressure also present a number of hazards.
Mishandled cylinders may rupture violently, release their hazardous contents or become dangerous projectiles. If a neck of a pressurized cylinder should be accidentally broken off, the energy released would be sufficient to propel the cylinder to over three-quarters of a mile in height. A standard 250 cubic foot cylinder pressurized to 2,500 PSIG can become a rocket attaining a speed of over 30 miles per hour in a fraction of a second after venting from the broken cylinder connection.
- Select the least hazardous gases that will work.
- Purchase only the necessary quantities.
- Select gases with returnable containers.
- When receiving gas cylinders:
- Check for leaks
- Visually inspect the cylinder for damage
- Ensure the valve cover and shipping cap is on
- Check for proper labeling
- If a cylinder is damaged, in poor condition, leaking, or the contents are unknown, contact your cylinder vendor. Have the vendor return the damaged cylinder to the manufacturer.
- Wear appropriate foot protection when engaged in moving or transporting cylinders:
- Sturdy shoes are a minimum.
- Steel-toed shoes if required by your supervisor, instructor or department.
- Proper personal protective clothing and equipment shall be worn.
- Always have an appropriate Material Safety Data Sheet (MSDS) available and be familiar with the health, flammability and reactivity hazards for the particular gas.
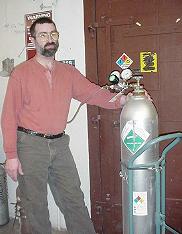
Cylinder Markings:
| Cylinders must be properly labeled, including the gas identity and appropriate hazards (e.g., health, flammability, reactivity).
Cylinders have several stamped markings. The top mark is either a DOT or an International Code Council (ICC) marking indicating pertinent regulations for that cylinder. The second mark is the serial number. Under the serial number is the symbol of the manufacturer, user or purchaser. Of the remaining marks the numbers represent the date of manufacture, and retest date (month and year). A (+) sign indicates the cylinder may be 10% overcharged, and a star indicates a ten-year test interval. |
- Cylinders should be stored in compatible groups:
- Flammables from oxidizers
- Corrosives from flammables
- Full cylinders from empties
- Empty cylinders should be clearly marked and stored as carefully as those that are full because residual gas may be present.
- All cylinders from corrosive vapors.
- Store cylinders in an upright position.
- Keep oxygen cylinders a minimum of twenty feet from flammable gas cylinders or combustible materials. If this can not be done, separation by a non-combustible barrier at least 5 feet high having a fire-rating of at least one-half hour is required.
- Compressed gas cylinders should be secured firmly at all times. A clamp and belt or chain, securing the cylinder between “waist” and “shoulder” to a wall, are generally suitable for this purpose.
- Cylinders should be individually secured; using a single restraint strap around a number of cylinders is often not effective.
- Keep valve protective caps in place when the cylinder is not in use.
- Mark empty cylinders EMPTY or MT.
- Keep valves closed on empty cylinders.
- Cylinders must be kept away from sources of heat.
- Cylinders must be kept away from electrical wiring where the cylinder could become part of the circuit.
- Store cylinders in well-ventilated areas designated and marked only for cylinders.
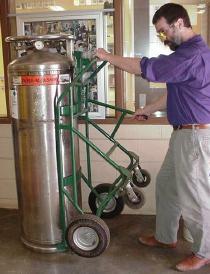
- Use a cylinder cart and secure cylinders with a chain.
- Don’t use the protective valve caps for moving or lifting cylinders.
- Don’t drop a cylinder, or permit them to strike each other violently or be handled roughly.
- Unless cylinders are secured on a special cart, regulators shall be removed, valves closed and protective valve caps in place before cylinders are moved.
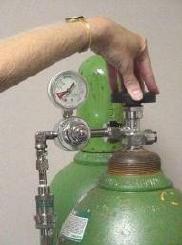
| Be sure all connections are tight. Use soapy water to locate leaks.
Keep cylinders valves, regulators, couplings, hose and apparatus clean and free of oil and grease. Keep cylinders away from open flames and sources of heat. Safety devices and valves shall not be tampered with, nor repairs attempted. Use flashback arrestors and reverse-flow check valves to prevent flashback when using oxy-fuel systems. Regulators shall be removed when moving cylinders, when work is completed, and when cylinders are empty. Cylinders shall be used and stored in an upright position. |
 Video: Leak Test Video: Leak Test(187.7Kbps) |
| The cylinder valve should always be opened slowly. Always stand away from the face and back of the gauge when opening the cylinder valve.
When a special wrench is required to open a cylinder or manifold valve, the wrench shall be left in place on the valve stem when in use; this precaution is taken so the gas supply can be shut off quickly in case of an emergency; and that nothing shall be placed on top of a cylinder that may damage the safety device or interfere with the quick closing of the valve. Fire extinguishing equipment should be readily available when combustible materials can be exposed to welding or cutting operations using compressed cylinder gases. |
 Video: opening valve Video: opening valve(187.7Kbps) |
- Never roll a cylinder to move it.
- Never carry a cylinder by the valve.
- Never leave an open cylinder unattended.
- Never leave a cylinder unsecured.
- Never force improper attachments on to the wrong cylinder.
- Never grease or oil the regulator, valve, or fittings of an oxygen cylinder.
- Never refill a cylinder.
- Never use a flame to locate gas leaks.
- Never attempt to mix gases in a cylinder.
- Never discard pressurized cylinders in the normal trash.
Poison gases represent a significant hazard. Special precautions not otherwise necessary become prudent when using poison gases.
|
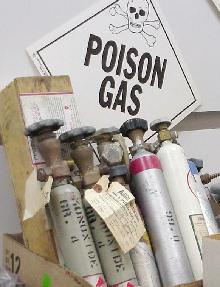 |
- Emergency procedures should be made clear to all involved, including personnel from adjacent labs and building managers.
- Poison gas use after normal working hours requires the approval of the Chemical Hygiene Officer for your department.
- Fume hoods and other ventilation need to be tested before use and checked frequently during the project involving poison gas.
- Notify the Department of University Safety & Assurances before your first use of the poison gas.
- The University Police should also be informed about the locations and types of poison gas in use.
- Document these procedures in your lab’s chemical hygiene plan. As with all chemicals, obtain and review the Material Safety Data Sheet (MSDS) for the poison gas. Maintain an extra copy of the MSDS in your department’s chemical hygiene plan.
Disposal of poison gas cylinders can often cause problems. If the cylinder can not be returned to the manufacturer, UWM can face large disposal costs ($1,000 per cylinder, or more). Even cylinders that can be returned must be shipped on a vehicle which cannot simultaneously carry any other hazardous materials or foodstuffs.
Authority and Reference:
- OSHA 29 CFR 1910.101 and .252 (General Requirements)
- OSHA 29 CFR 1910.102 (acetylene)
- OSHA 29 CFR 1910.103 (hydrogen)
- OSHA 29 CFR 1910.104 (oxygen)
- OSHA 29 CFR 1910.105 (nitrous oxide)
- DCOM 32.15 and 32.28
- Compressed Gas Association (safety publications)
Additional Information:
- Compressed Gas Cylinder Training Outline, UWM Department of University Safety and Assurances
- Safety Alert: Defective Gas Cylinder Valves United Auto Workers Occupational Health and Safety Newsletter, November, 2000